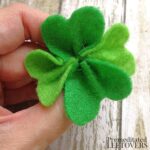
Hand-Stitched Felt Four-Leaf Clover
Learn how to create hand-stitched felt four leaf clovers easily with this simple tutorial. This is a quick and easy Patrick's Day craft.
Equipment
- scissors
- Needle
Materials
- Green felt you can use one shade or various shades like we did
- Thread
Instructions
- To begin, you want to cut out felt "m" shapes. These are best described as having a flat bottom and double hump on top. The size you cut these will depend on the size you wish for your clovers to be. We made ours about the size of a half dollar. Cut out 4 of these "m" shapes for each 4-leaf clover you wish to make.
- Next, you want to create a mini banner with your thread and felt cut outs. Attach the thread to the needle and poke through the top of the shape. Pull through and poke back up through the felt, then poke down once more. Finish by poking upward one last time and pulling the thread through. Essentially, your needle will be moving down, up, down, up.
- Repeat this step on each of the four cut outs add them to the same thread. Once all of the pieces have been threaded, hold the end of the thread and push all of the pieces together. As they scrunch up, you will see the felt four leaf clover take shape!
- You may need to do a little primping to the clover to make the pieces lay nicely. Keep pulling the felt pieces tightly together, and then use the remaining thread to make a few center stitches to hold them in place.
- When you are done, make a double stitch to secure the thread. Then clip the thread.