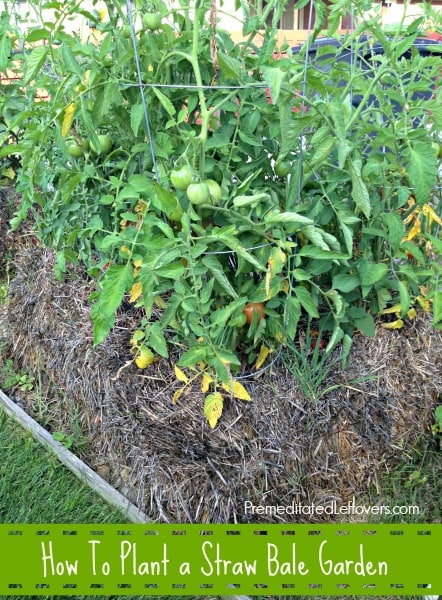
It seems like more and more people are giving straw bale gardening a try. What is straw bale gardening you ask? Well it is a unique way of gardening where your crops are planted directly into a straw or hay bale where they remain for the rest of the growing season! No garden rows, no digging in the ground, and no traditional gardening methods required.
Straw bale gardening has its many perks, which may be why so many people are starting to take advantage of it. Some of the perks of a straw bale garden is it requires less effort than setting up a traditional or box bed garden, the straw absorbs and holds water well, and the constantly decomposing straw bale provides the perfect growing environment.
If you live in an area where the growing season is a quick one, a straw bale garden is ideal for you since it heats up well and can get your plants going sooner. So are you convinced yet that a straw bale garden is right for you? Take a peek below and see how easy it is to plant your own.
How to Make a Straw Bale Garden:
Supplies Needed:
A straw bale
Small shovel
Seedlings or seeds
Water
Fertilizer
Optional trellis or tomato cages
Directions:
1. First, place some weed prevention where your bale will sit. A landscaping fabric of some kind is ideal.
2. Next, set your bale on top of the fabric. You can find bales at your local gardening centers or even at local farms where it may be offered in organic form.
3. About ten days before you are ready to plant, you want to prepare the bale by watering it well and even applying fertilizer. Did you ever think you would find yourself watering a bale of hay? It really is quite fun and simple. Just apply water for 3-4 days, apply some fertilizer on the 5th day, and water for another 3-4 days before applying fertilizer a second time. This will help prepare the bale and make it a rich environment for your plants to grow in.
4. Look for signs that your bale is ready for planting. This can be a number of signs including mushrooms growing from your bale, and a dark and warm center that is visible when you poke your finger into it.
5. Now get planting! Use a small gardening shovel to make a hole in the top of the bale. Add a little soil into the hole and then bury your seedling. You can also plant seeds directly into the bale if you wish, just add a little extra soil if you do so.
6. While planting, be sure to follow the same spacing instructions as you would if planting in the ground. Water the bale well when you are done.
7. Now you just wait! Water your bale as you would a regular garden and wait for your produce to grow. You will find that it grows just as strong and with less weeds. That means less work for you. At the end of the growing season don’t toss that bale, just throw it in your compost bin. Now that is recycling and repurposing at its best.
See how simple it is to plant a straw bale garden? It is fun, frugal, and just a neat way to grow your plants. If you are looking to grow a garden in a way that easy and unusual, jump on the straw bale garden bandwagon and see what all of the fuss is about!

Arleen says
I can’t seem to get my bales to heat..what am I doing wrong??
Christine says
Hi there, do you use straw or hay? (two different things)…or are either OK? thanks!
bill says
rye or wheat and even alfalfa straw. Do not use hay (it’s grass) and is loaded with seeds. Also pine is a no no as well. I have done alot of research. I live in north Florida and it’s very hard to find straw. I did however get lucky from a friend who is picking me up 2 bales of wheat. I’ll be working on this over the next few weeks. Very excited I must say. Gardening in New Jersey was great!
Jan Elizabeth says
Cool idea! I’d never heard of it before.
MaryBeth says
Awesome idea! Thanks for sharing!!