Rheney Williams is sharing how she created a planter box to grow blueberries on her patio.
DIY Fruit-Filled Planter Box
If saving money, eating healthy and always having something tasty on hand are among your goals, then a fruit-filled planter box in your backyard is an easy project that can accomplish each of them. And even if you’ve never attempted anything DIY before, constructing and filling your own custom planter is within your grasp.
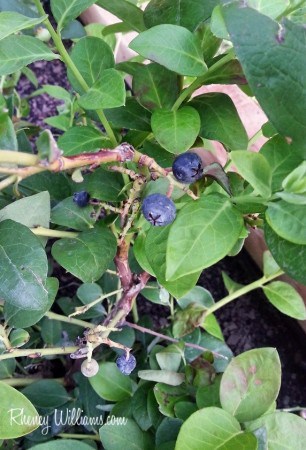
I have always wanted to grow blueberries. Not only are they fantastic when mixed into muffins, but they are also extremely versatile in other baked goods and savory dishes.
One interesting thing to note about blueberries is that although certain varietals are self-pollinating, you can achieve better fruit by planting at least two different types of bushes in conjunction. This cross-pollinating action allows the berries to achieve a “best of both worlds” situation where you and your family reap all of the fruity benefits!
To that end, I selected a Sunshine Blue Blueberry and a Sharpblue Early Season Blueberry as my bushes of choice. The Sunshine Blue is a dwarf that will not take up much space and the Sharpblue Early Season is a variety that will bloom virtually all year long. And because I live in Charleston, South Carolina, both of the berry bushes will withstand the mild Southern winter with ease.
So now that you know a little more about my berries, here’s how I made my DIY fruit-filled planter box!
DIY Planter Box Tutorial
For the planter box that I designed specifically for my blueberries, I used:
- Cedar Logs: 7 pieces at 8 feet long
- Chop Saw or Miter Saw
- Exterior Wood Screws: 2 ½” Long, Tan
- Power Drill
- Landscape Cloth or Weed Barrier
- Craft Stapler
- Potting Soil: I ended up using 4 of the 32 Quart Sized Bags for my planter box
- Top Soil or Mulch
- 2 Types of Blueberry Bushes
Directions:
Cedar logs for landscaping are available in your home improvement store’s garden section or lumber area and are perfect for outdoor applications as cedar is naturally resistant to rot and insect infestation. Begin by using your chop saw or miter saw to cut the logs into the following pieces:
- Cut 5 logs in half to create 10 pieces at 4 feet long
- Cut 2 logs in quarter sections (cut in half and then half again) to end up with 8 pieces at 2 feet long: I opted not to use the last 2 pieces measuring 2 feet long but I’ll save those for another outdoor project.
Select your planter box’s final resting place before you construct it because it will be very heavy when complete and moving it will be difficult. For me, I chose an outer corner of our back patio that receives full sun – at least 6 hours daily.
Begin forming your “trough” skeleton by laying four of the 4-foot pieces lengthwise and two of the 2-foot sections at either end. If it helps to conceptualize the end result, my main inspiration was a log cabin!
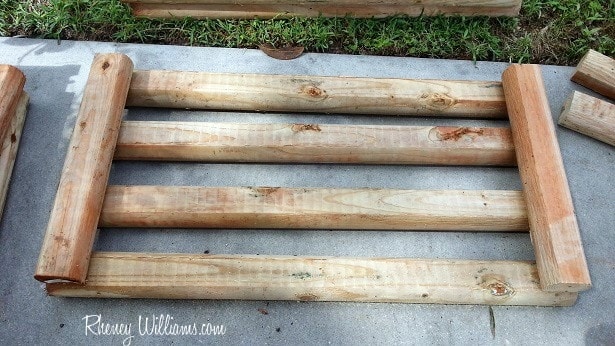
Using your power drill, secure your 2-foot pieces to the 4-foot piece below by countersinking (drill until the top of the screw sinks into the wood) an exterior wood screw into the bottom log at an angle. I drilled one screw into each corner for a total of 4 screws per level. Again, because you won’t be moving this, you just need to secure the corners together to the point that they will remain intact when planted.
Keep in mind that the two 4-foot pieces in the center are there as support for the weight of the soil and bushes, so you will not be doing layers of four pieces all the way up: From here, just add 4-foot pieces on the outer edges to create a deep well in the middle.
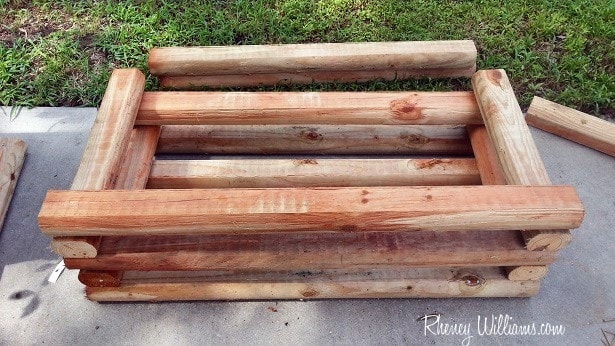
Continue securing the two short pieces to the two long pieces with wood screws until you have a planter box that is four long layers and three short layers like this:
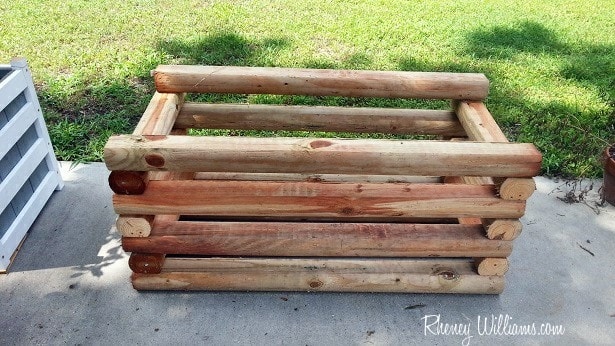
Line the inside of the box with landscape cloth cut to fit and secured to the inside edges of the top layer with craft staples. Be sure to leave enough slack in the cloth to support the volume of soil you’re about to add.

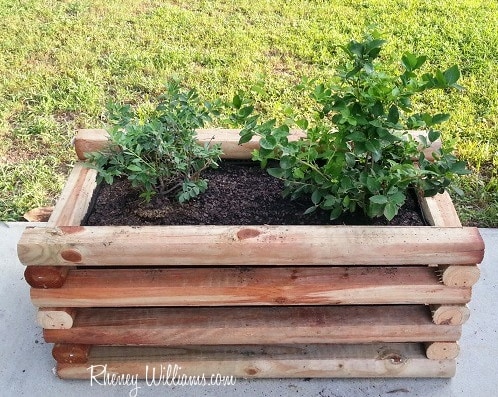
Fill the lined box with your potting soil and place the plants inside so that the top of the root ball is slightly above “ground” level. Continue filling with soil to surround the base of the plants; water and tamp down the soil; finish off with 1-3″ of top soil or mulch.

And now all you need to do is keep your bushes watered according to their specific directions, watch them grow, and wait until you can harvest their sweet and wholesome goodness!

What other types of fruit do you want to plant in your DIY planter box?
Rheney Williams writes about her DIY garden and home projects for Home Depot. Rheney has been building planters and other crafts this spring and summer, using her bevy of power tools. Home Depot’s broad selection of power tools can be found online.

Eric says
Very nice. Did you put the liner on the bottom, too? I’d think leaving it open or screened would allow worms to get in and help?