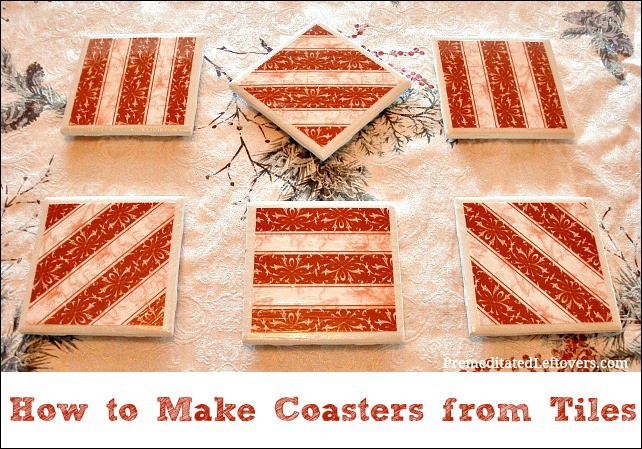
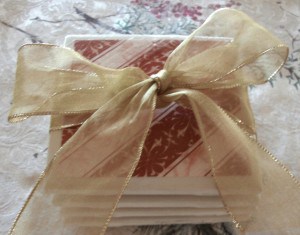
Coasters are easy to make and they cost very little to create, but they do take time. Usually you make coasters in sets of four. I bought six tiles, planning on ruining at least two. I’m a positive thinker that way. Actually, I ruined five and my son ruined the one perfect one (Note to self: don’t try doing a craft project, while watching a parenting webinar, cooking dinner, entertaining a 4 year old, and talking on the phone). But you know what? If they were perfect they would look like they were created by a machine, mine are decidedly handmade. So if you feel like one layer isn’t quite right, just let it dry and then add another layer of Mod Podge. Mod Podge can hide a multitude of mistakes.
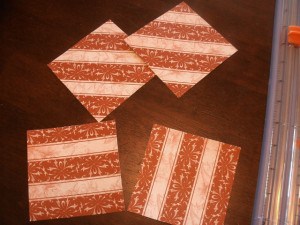
You can cut the paper so it just reaches the edges, so that it folds over the edges, or so that it stops short of the edges and is “framed” by the outer edges of the tile. I chose to go with the last option and cut my paper so that 1/4 inch of tile would show all around the paper.
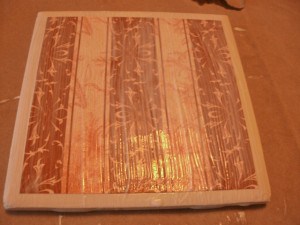
I did the brush strokes of the mod podge in the same direction as the striped paper. Each coat of mod podge needs to dry for 15 – 20 minutes before you can apply another coat.
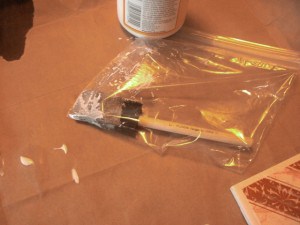
I store the foam brush in a plastic bag between layers of mod podge so it doesn’t dry out.
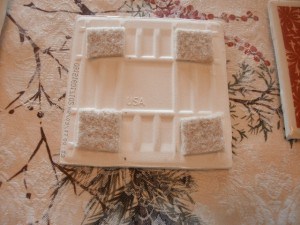
You can cover the bottom entirely with felt or just cut squares for the corners.
Tips for Saving Money on this Project:
If you do not have mod podge or sealant already, then buy them with your 40% coupon at Michaels.
You can make your own mod podge.
Pool resources with a friend.
How to Make Coasters with Tiles
Items Needed:
4 – 4″ tiles ( .15 – .19 cents each)
1 – 2 pieces scrap book paper ( ~.25 cents each)
Mod Podge (~ $5.00 per jar, but you only use less than .50 cents worth for this project)
sponge brush (.50 cents, but it is reusable)
sealant ( ~ $5.00 per can, but you will use less than .25 cents worth for this project)
2 rectangles of felt (.15 cents each)
glue
Directions:
Clean tiles with glass cleaner.
Cut paper for tiles according to your preference (wrap, even with edges, stop short of edges).
Apply mod podge to tile in a thin layer with foam brush.
Place paper on tile. Spread from center of paper to the edges, smoothing paper and eliminating air bubbles. Let dry for 15 – 20 minutes.
Apply mod podge to paper in a thin layer with foam brush. Let dry for 15 – 20 minutes. Repeat 3 more times.
Let sit overnight. Apply felt to the bottom of tile. Then spray with sealant. Let dry for 2 hours and spray with sealant again. Let dry for one day before using with cold drinks. Don’t use it with hot drinks for 30 days.
Mod Podge takes a full 30 days to cure. The coasters may be used with cold drinks after the sealant has dried, but you should wait for a full 30 days before you use these coasters with a hot drink. So include a note saying when these are safe to use with hot drinks if you give them for Christmas.
Related Posts:
How to Make Sugar Bowl Candles
How to Make Note Cards from Kids Art Work
This post is part of The Week of Handmade Gifts and Frugal Friday.

Beth @ Aunt B's Kitchen says
Great idea Telisa. 🙂
If any of you are looking for an even more inexpensive source for tile and have a Habitat for Humanity ReStore in the area, it’s worth checking out. I often find small lots of tile, or even single tiles, there for just a few cents each. Great for crafting projects.
Telisa says
I am going to try this project with my son. I think though I am going to try using some small pictures that he has drawn himself on the tiles. I think they will be adorable. Thanks for the idea.
Alea says
I absolutely love that idea! I am going to share it on my Facebook wall. Please, let me know how it turns out.
Natasha Parlier says
Do the coasters absorb the wet from a glass?
Alea says
No, the coasters don’t absorb the water.
Chelsey says
My felt is messing up the tops of the other coasters when stacked!??? Please help I have made a ton
Alea says
Have you given them time to properly dry? I let the mod podge dry overnight before applying sealant and then I let the sealant dry for a day before stacking or using.
You can try smoothing out the tops with another coat of mod podge. Let sit overnight and then seal again and then let it dry for a day before stacking or using.
Sunny's Life in Rehab says
Thanks for recommending our little decoupage medium recipe, and by the way, I love how your project turned out!
Tonya says
what kind of sealant are you using
Alea says
I used an acrylic sealant with a matte finish because I had it on hand – a leftover from one of my kid’s art classes.
Desiree H says
I am in the middle of making these – just have the felt and sealant to go. They are coming out beautifully! Your directions are great, clear and simple. Thanks!
Alea says
Thank you! I am excited to hear that it is going well. If you post a picture, let me know. I would love to see your coasters.
Desiree H says
Will do – after Christmas. The recipient reads my blog… 🙂
Alea says
I know how that is. There are quite afew things I would love to share, but I can’t or I will ruin the surprise. Those presents will be shared in Next Year’s posts. 🙂
April @ The 21st Century Housewife says
These look beautiful – what a unique idea! I like your step by step tutorial too. Your coasters would make a great gift any time of year.
Rebecca in Colorado says
I like it! No freezing, no candy thermometer…I think maybe I could do this! 🙂
Kitchen Belleicious says
that is so neat and so crafty of you. I am so not crafty but this I think I could pull off! Love it
Desiree says
I love this idea…is Home Depot or some such the best place to get tiles? I’ve never bought them. Thanks. 🙂
Alea says
Yes, you can buy the tiles at Home Depot of Lowe’s.
Jen says
This is an awesome idea because I have a TON of leftover tiles in our house that were there before we moved in. Can you say . . . no purchase necessary? Love this idea!