Katie is sharing how she gave a vintage dresser a makeover:
I think at some point or another we have all run into that old furniture piece that is just sad. It may be something you saw at a garage or estate sale, or perhaps it even caught your eye on the curb. Or maybe, you have one of these sad and beat up pieces in your own garage or basement. Whatever the case may be, you most likely went about your merry way unsure you could salvage the piece and give it new life. Well you won’t think that way again! Below, you will find out all you need to know about doing your own vintage dresser makeover.
This DIY vintage dresser makeover is great to stumble across because as you probably know, these outdated pieces are everywhere dying to be saved. You can typically buy them rather inexpensively, making them a fun a frugal project that will give you a practical piece of furniture you can use. Take a look!
DIY Vintage Dresser Makeover:
Supplies Needed:
A vintage dresser. Make sure the “bones” are good, meaning it is structurally sound free from broken legs, heavy mold, cracking, etc. You can find these at thrift stores or yard sales, even on the curb on trash day.
Mid-grade sandpaper
Paint of your choice
Paint Brushes or Rollers
Basic tools such as screwdriver, hammer
Scrapbook paper of your choice
Ready? Here we go!
Directions:
1. First, clean your piece well. Use wood soap and warm water and scrub with a soft rag or sponge. Next, dry well with a soft rag.
2. Lightly sand the piece. Going in the direction of the wood grain, start sanding. This will help paint adhere well and smooth out any flaws or blemishes. Use a rag to wipe clean.
3. Make any repairs. Tighten screws, hammer down any loose nails, seal cracks with wood filler.
4. Prepare to paint. Remove the hardware (handles for example) so you can paint cleanly.
5. Start painting! Take your time and apply two coats of the color of your choice. Quality paint in a satin finish is ideal however you can use whichever finish you wish. High gloss will accentuate any flaws in the wood, so try to stay clear of that.
6. Once dry, lightly sand the edges to make the piece look distressed.
7. You can coat with a clear finish if you wish, or leave as is.
8. Spray hardware the color of your choice and allow to dry. Attach when done.
9. Fancy up the piece by lining drawers with charming scrap book paper or drawer lining paper. This makes the piece look clean and neat plus ads some color.
10. Add any finishing touches such as hand painted accents, rub on transfers, or any other decorative touch you wish!

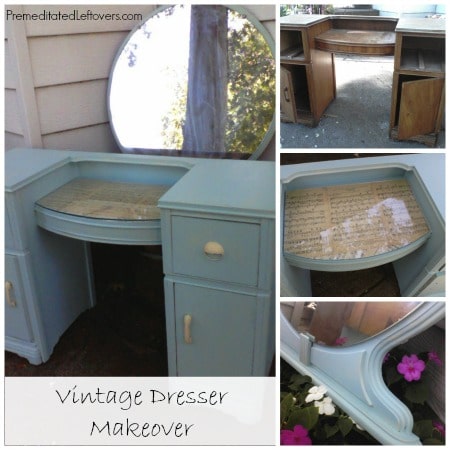
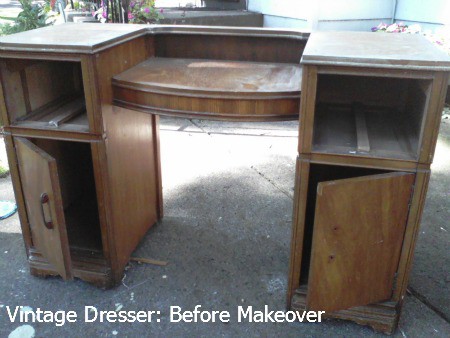
As you can see in the example photo, we took a 1940’s cascade style vanity and gave it a lovely face lift using the steps listed above! We made some light repairs, painted the dark wood a light blue, sprayed the rusty handles a cream color, and lined the vanity tray and drawers with sheet music paper. These simple steps really transformed the piece and made it look like an item that would come out of an expensive boutique!
You can get these same results too. Just find a solid piece and get started using the steps above. Diving in is the best way to give this project a try, so see what you can come up with. In no time and with little expense, you too can create a custom furniture piece that looks like it cost big bucks!
Katie Femia is a wife and mother of three. She loves vintage finds, handmade goodness, the frugal life, and the long road to publication. You can find her at The Savvy Luna Bugg, the blog for frugalistas seeking simplicity through a handmade and vintage lifestyle.

Cristin Frank says
Thank you for saving this piece. It is so gorgeous. I love the colors and the music sheets highlight its vintage charm! I stripped down a 1920s child’s dresser – what a labor of love! You can see it here: http://eveofreduction.com/1920s-childs-dresser-restoration/