• Home
  • About
    • Privacy Policy
  • Blog
  • Prep-Ahead Meals Cookbooks
  • Recipes
  • Lifestyle
  • Gardening
  • Kid’s Activities
  • Gluten-Free Recipes
  • Budgeting Tips
↑

Premeditated Leftovers™

Prep-Ahead Meals, Cooking Tips, and Frugal Living

  • Cookbooks
    • Prep-Ahead Breakfasts and Lunches
    • Prep-Ahead Meals From Scratch
  • Recipe Index
  • Home
  • Blog
  • Recipes
  • Gluten-Free Recipes
  • Lifestyle
  • Garden
  • DIY
  • Kids
  • Budget

You are here: Home / Naturally Frugal Living / How to Make Baby Shower Invitations With PicMonkey

How to Make Baby Shower Invitations With PicMonkey

June 10, 2014 by Ann Leave a Comment

This post may contain affiliate links. Read our disclosure policy here.
227 shares
  • Share
  • Tweet

How to Make Baby Shower Invitations With PicMonkey

PicMonkey is an awesome free photo editing tool. I use it for my blog posts, printables, recipes, and more! Today, I’m showing you how to make baby shower invitations with PicMonkey. If you have any questions, leave them in the comments!

How to Make Baby Shower Invitations With PicMonkey

Make Baby Shower Invitations With PicMonkey

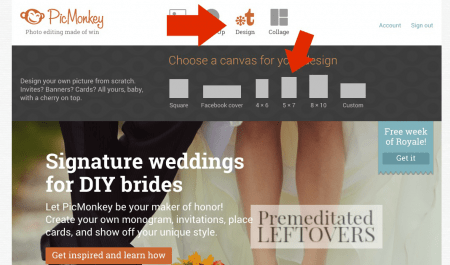
Sign up for PicMonkey, or use the free version — either way you can make invitations, but I think it’s totally worth a few bucks a month for the premium features. Log onto picmonkey.com, and choose design. I chose 5×7 for invitations, but you can pick any size.

How to Make Baby Shower Invitations With PicMonkey

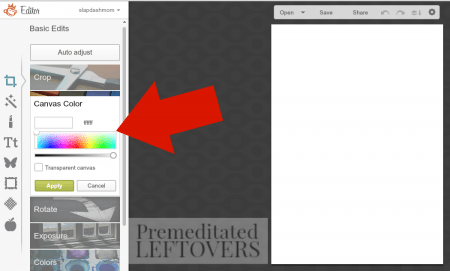
Next, choose your canvas color. For these baby shower invitations, I chose blue. I recommend choosing lighter colors just because it seems that bold colors smear more when printed – unless you’re printing on photo paper, then it might work out. 🙂

Frugal Tip: Print the invites on colored paper, and choose “transparent” for your canvas, to save money on ink.

How to Make Baby Shower Invitations With PicMonkey

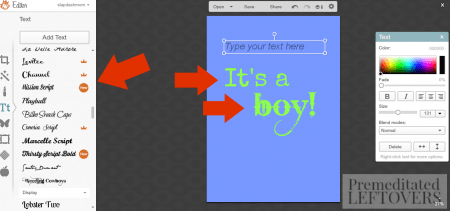
Choose your font (on the left), then add your text (on the right). The arrows are there to show you that I used separate text boxes for each line. I have found that this is the easiest way to keep things aligned the way I want them. If you do one text box, you have to align center, right, or left. I like to have things a little off-center but not all the way to one side or the other.

diy baby shower invitations

Add an image – I used the ones under the Nautical section. Right click on the image, and click send to back, so your text will be in front of the image. You can change the color of your images, as well as the color of your text. You can also fade the image out if it’s too bold.

diy baby shower invitations

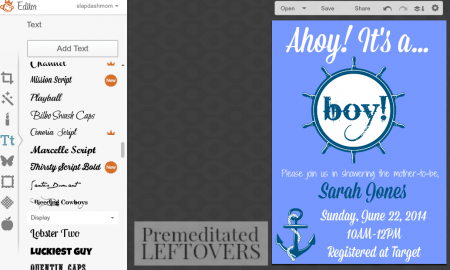
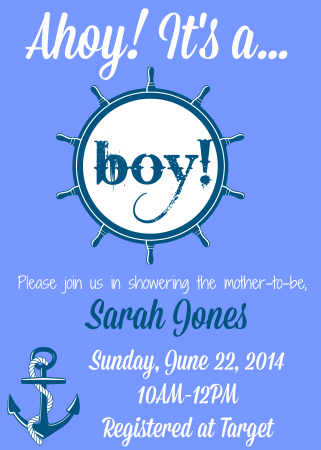
Keep fiddling with the text and images until you love them! As you can see from the difference in the first image and this one, I changed quite a bit before I was happy. That’s the beauty of PicMonkey – nothing is final, you can make changes all the way up until you close the image out. Save several versions if you’re not sure which one you like best.

diy baby shower invitations

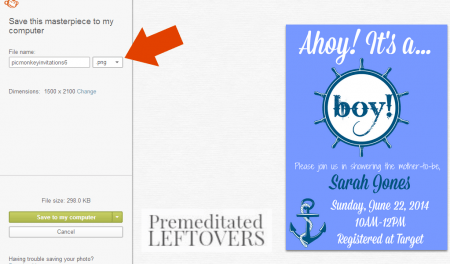
I save my creations as a .PNG when possible. The other option, .JPG, is great for photos but created images are different.

diy picmonkey invitations


Final image! 🙂 Print and mail, or send them to Walgreen’s to be printed as photos.

Would you like to save this article?

We'll email this post to you, so you can come back to it later!

227 shares
  • Share
  • Tweet

Leave a Reply Cancel reply

Your email address will not be published. Required fields are marked *

Recipe Rating


Search

Recent Articles:

Spring Cleaning Checklists Room by Room Cleaning Tips

Spring Cleaning Checklists Room by Room Cleaning Tips

Tips for Organizing Your Home for Spring Cleaning

Tips for Organizing Your Home for Spring Cleaning

Tips for Decluttering Your House for Spring Cleaning

Tips for Decluttering Your House for Spring Cleaning

BROWSE:

  • Blog
  • Cookbooks
  • Recipe Index

ABOUT:

  • About
  • Contact
  • Privacy Policy
  • Disclosure

Welcome. I'm Alea!

On Premeditated Leftovers I share simple recipes made with whole foods, practical shopping tips, time saving techniques, and meal planning strategies. I also share tips for minimizing food waste, so more of the food that is purchased ends up on the table.

While volunteering as a budget counselor, I realized that food is the element of most people’s budgets where they have the greatest control. I set out to develop low-cost recipes from scratch to prove it’s possible to create delicious meals on a limited budget. Eating well while spending less is about more than just creating recipes using inexpensive ingredients; it’s about creatively combining ingredients so you don’t feel deprived and are inspired to stick to your budget.

Copyright ©2026, Premeditated Leftovers™. All Rights Reserved.
Design by Pixel Me Designs

Share anywhere