
How many times have you come across an old globe at a thrift store or garage sale? Or perhaps you still have one hanging out in your garage somewhere? Your first thought might be to toss it, considering the globe may be outdated an unable to be used for the purpose it was originally intended. But wait! Don’t toss that old globe just yet, repurpose it instead! Take a look at how you can turn a globe into a fully functional and decorative bowl instead. You don’t need a great deal of supplies, and the end result is a beautiful bowl perfect for displaying your seasonal treasures.
Let’s take a look at what you will need:
- Globe
- Hot glue, glue gun
- Wooden Plaque
- Paint
- Knife
For our project we used an ivory colored paint for the base and inside of our bowl. You can choose any color you wish and do not need to feel limited by this shade. The wooden plaque can be found at Hobby Lobby or any other craft stores for that matter, and are rather inexpensive. Ours cost only $0.79!

Directions:
1. Begin by removing your globe from the metal base and hardware. This typically just means gently bending the metal restraints and pulling it free.
2. Now you want to separate your globe into two pieces. Do this by placing the point of your knife on the middle seam of the globe. As soon as you look at your globe you will see this seam where the maker connected the two pieces. Just slide the knife in and shimmy it to loosen the two pieces apart.
3. Apply a coat of paint to your wooden plaque. This will serve as your base. You only need to paint the part which will be visible and can leave the opposite side bare.
4. Now it is time to attach the globe to the base. Once your plaque is dry, apply some glue to the bottom of the globe. Be generous and focus on the one inch by one inch space on the bottom.
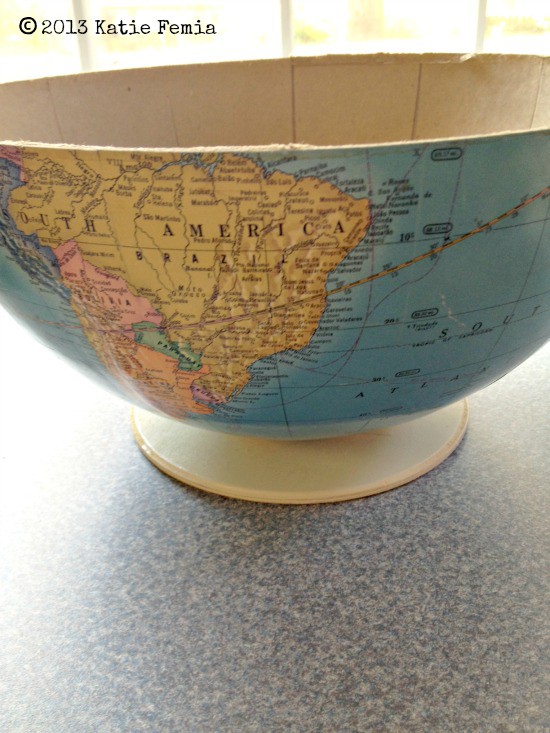
5. Press the globe firmly to the plaque and press down gently. Inside the globe you will notice a small hole where the hardware was. Take your glue gun and fill in this hole with glue for extra anchorage.
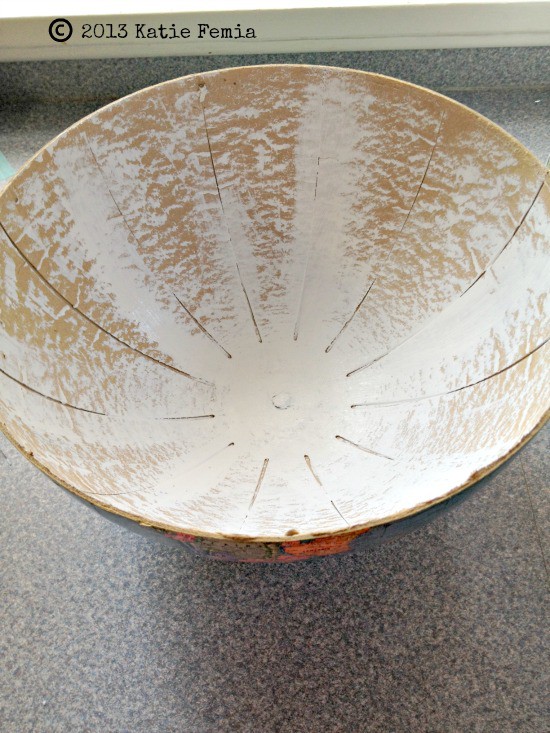
6. Using a paint color of your choice, paint the inside of the bowl to cover and blemishes or boring cardboard. We used an ivory color as mentioned and brushed it on with a dry paint brush for a cool worn out look.
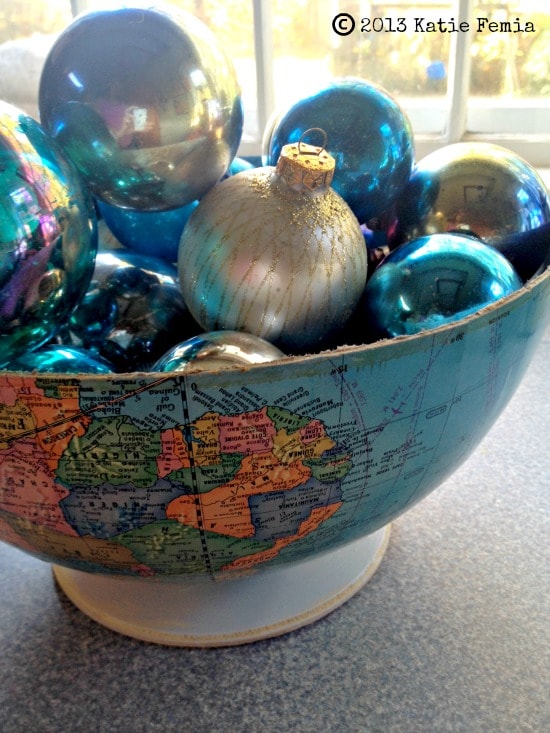
Now all you need to do is find something to use as a filler in your bowl. Why not think seasonal? For example in the fall it would look lovely with pine cones, and in the winter these old blue glass ornaments were the perfect touch. Get creative and see what you can gather up for your bowl!
As you can see, this repurposed globe bowl is a great way to give an old globe new life. It is so easy to do, and the end result looks like a cool antique store find you paid big bucks for. So give this easy DIY project a try. It is one that is totally out of this world. Sorry, I had to say it!
Do you enjoy upcycling old things that might otherwise end up in the trash?

Leave a Reply