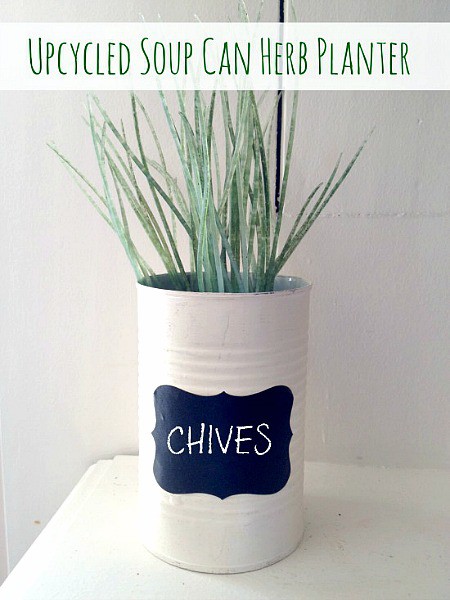
Spring is quickly approaching, so why not take this opportunity to prepare some herb pots? Fresh herbs are always nice to have on hand when cooking or crafting, and growing your own is more cost effective than buying from the grocer. You don’t need any fancy supplies to make your own potted herbs, in fact you can make a pot using an old soup can. Take a look below at how to make your own easy upcycled herb pot. In no time you will be growing fresh herbs to enjoy.
Upcycled Soup Can Herb Planter
Supplies needed:
Check your own recycling bin and hardware supply to see which of these items you may already have. Chances are you have most of these supplies, making this a project you can do for cheap or even free.
- Metal soup can
- Spray paint
- Nail
- Hammer
- Chalkboard label
- Soil
- Seeds
- Pebbles
Directions:
1. Begin by applying a coat of paint to your soup can. Spray one or two coats depending on your preferences.
2. When dry, turn the can over and place the nail on the base. Tap it a few times with the hammer so that a hole is made. Repeat this process several times until you have created 5-6 drainage holes.
3. Peel and stick a chalkboard label onto the front of the can. Adhere it with additional glue if you wish.
4. Fill your can about ¼ way full with pebbles. This will help with drainage.
5. Cover the pebbles with soil and continue to add soil until the can is just about full.
6. Plant your seeds or seedling according to package directions.
Now all you need to do is place your upcycled herb pot in a sunny window and watch it grow. The chalkboard label is great for labeling your various herbs. You can even write the planted date on it so you know when they are ready to harvest.
Making your own herb pots is easy when you give this upcycled herb pot project a try. So gather your supplies and start growing!
More Tips and Ideas for Growing Herbs:


Leave a Reply