By this time of year I welcome the cooler weather and the changing colors of the landscape. Apples, pumpkins, and color-splattered gourds are starting to adorn storefronts. Hues of red, orange, and yellow are everywhere and make for some beautiful home décor as well.
Your front door is the first thing visitors see when they visit and a wreath is the perfect way to meet them with a cheerful welcome. When it comes to decorating for the holidays this is where I always start. When my wreath is up you can bet that some serious decorating is going on inside. Wreaths don’t have to be elaborate and expensive either.
DIY Fall Harvest Wreath
Supplies Needed:
- 1 foam or straw wreath
- Burlap trim
- Yarn, string, or twine
- Scrapbook letters
- 3 or 4 sprays of fall leaves, berries, pumpkins and/or twigs
- Hot glue gun and glue sticks
- Optional: ribbon to hang
Directions:
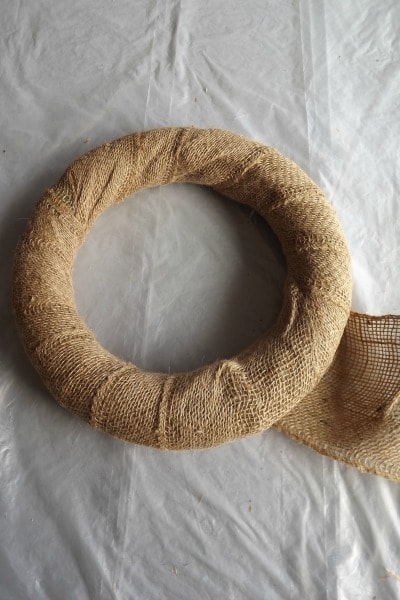
Begin by wrapping the burlap trim around the wreath. Once the wreath is completely covered, secure the end of the trim with a few small dots of hot glue.
Lay the scrapbook letters face down and backwards to spell out the word, ‘Harvest’.
Measure and cut a piece of yarn that will span from both sides of the wreath and wrap around the back.
Line the yarn along the back of the letters and use a small dot of glue to attach each one.
Glue the ‘Harvest’ banner to the back of the wreath on each side.
Stagger and glue the fall sprays along the lower right side of the wreath. Manipulate the wire to help the sprays crawl along the shape of the wreath. Pick them apart if you needed to fill in bare areas with smaller pieces.
If you would like to use a ribbon to hang, loop it through the wreath giving yourself a little slack before tying a small bow.


Leave a Reply