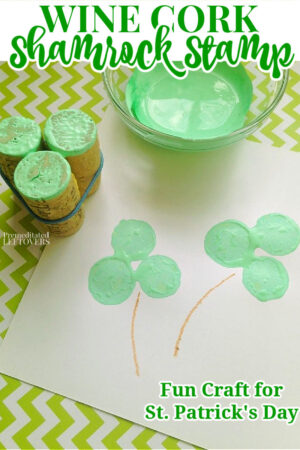
These DIY wine cork shamrock stamps are a fun and easy St. Patrick’s Day craft for kids.

Are you ready to celebrate St. Patrick’s Day? If so, these wine cork clover stamps should do the trick! You can make your own wine cork clover stamps using just a handful of old corks, a rubber band, and a little paint. How simple is that? If you are ready for some St. Patrick’s Day fun, take a peek below at how you can get started making your own wine cork clover stamps!
DIY Wine Cork Shamrock Stamps
You can use 4 wine corks to make a 4-Leaf Clover if you wish.
Supplies needed:
-
- 3 wine corks
- Rubber band or hair tie
- Green paint
- Small dish
- Paper
- Brown crayon

If you don’t have any wine corks on hand, you can always find them at craft stores. Or, just ask your friends to share.
Directions:
1. Begin by placing the three corks tightly together. You want to stack them like a mini pyramid. You can use glue to reinforce them, but it isn’t necessary.
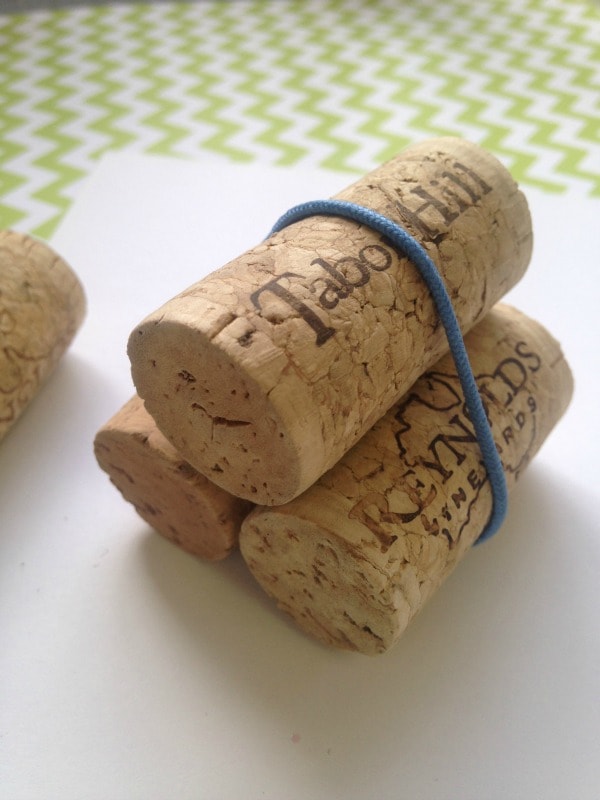
2. Once your corks are stacked, use a rubber band or hair tie to hold them together. Wrap it so it is nice and tight, and so that the corks won’t slip.
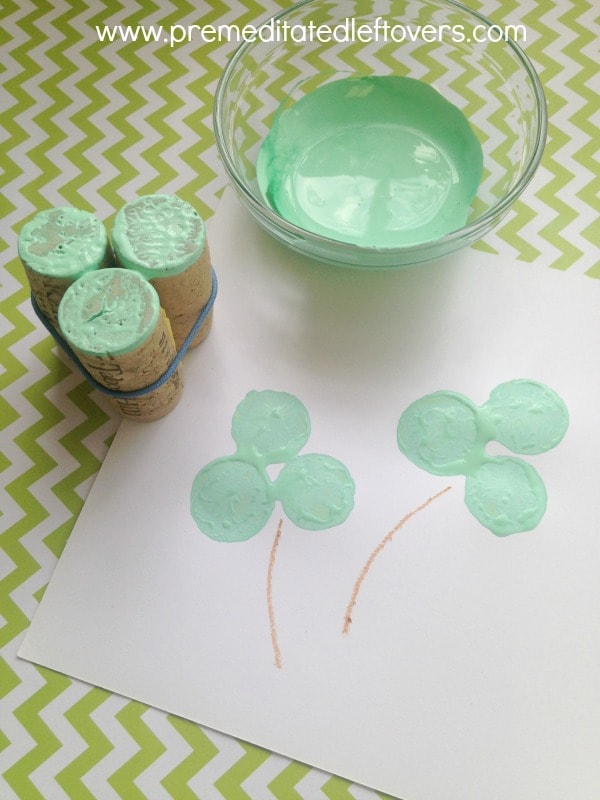
3. Now, add your paint to a shallow dish or lid that you can easily dip into.
4. Dip the cork stamp into the paint and wipe off any excess. You can use your finger to do that step if you wish or blot it on a paper towel.

5. Press the stamp firmly to the paper and watch the clover imprint appear!
6. Allow the paint to dry. Add a stem with a brown crayon or marker when done.
Does it get any sweeter than these easy wine cork clover stamps? I don’t think so! They are perfect for getting you into the St. Patrick’s Day spirit and all things clovers. You can use them to decorate cards, banners, or just to keep little hands busy. When you are done, simply rinse the paint off the ends of the corks and you can use them again. Or, set the corks aside for crafting later on.
Gather your supplies and give these wine cork clover stamps a try. They are such a fun way to use wine corks.
More St. Patrick’s Day Activities for Kids
15 St. Patrick’s Day Crafts for Kids
4 St. Patrick’s Day Games for Kids

Barb @ A Life in Balance says
Thank you for contributing to Motivation Monday!
Cathy says
Love, love this! So creative! We are gearing up in green for St. Patrick’s day and celebrating it with a sweet shamrock shake! I would love for you to stop over and check out my shamrock shake recipe! 🙂
Cathy
Theresa @DearCreatives says
Such a cute & easy idea. I’d love it if you dropped by and shared it at my weekly party! Stop by anytime!
Erlene says
I love easy crafts like this. Would love if you came and shared this on our Spring Craft Blog Hop.
Gina says
Love this! I can’t wait to try it with my little ones! Saw this post over at Crafty Allie:Worthwhile Wednesdays. Thanks for sharing such an awesome idea! Pinned it!