
What do you do when you are driving down the road and see an old headboard on the curb? You stop and pick it up of course! If you are a regular thrifter or curb collector, you may have noticed how often old wooden headboards are in the offerings. Up until now you may have wondered what to do with those old headboards, since their size and shape make them a little difficult to work with for most projects. But after you read below about the easy craft you can create with them, you won’t be able to get your hands one soon enough. Take a look at how to turn that old headboard into a nifty yard sign, perfect for displaying at your next party or in your yard all year long. Take a peek!
Repurposed Headboard Yard Sign
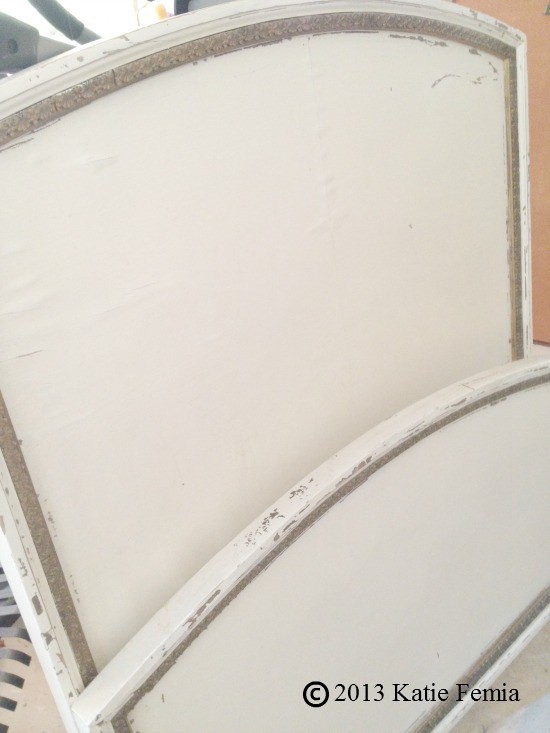
First, let’s take a look at what you will be needing to complete this project. You will need a headboard of course. Check out local yard sales, thrift stores, or even curbs and auctions for one. Don’t worry about if it has its mate, as you will only be using the one half anyhow. Look for something solid. It does not matter if it is clean or has chippy paint. That can all be fixed later. Just look for something solid. The rest of the decorative supplies can all be found at your local craft store.
Supplies needed:
- Old headboard (ours was a thrift store find for just $5)
- Assorted paint brushes
- Exterior house paint
- Sandpaper
- Stencils (optional)
Directions:
- Begin by washing the headboard with some mild soap and water. Dry it with a soft cloth.
- Lightly sand away any blemishes and chipping paint. You may wish to wear a mask when you do this for safety.
- When your surface is nice and clean, apply your color of base paint. For ours, a coat of clean white did the trick. Two coats seems to finish the piece nicely!
- You can distress the piece by lightly sanding the edges after the paint dries. For a more polished look just leave it as is.
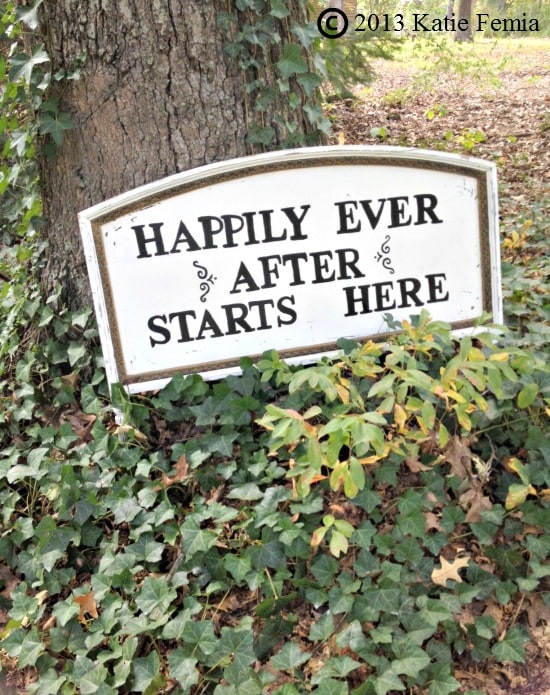
- Now, you can choose what you wish to write on your sign. Here are a few ideas: Welcome, The Smith House (enter your own last name of course), Party, Our Home, or you can create a saying that is meaningful to your family. For the sample picture, the headboard was gifted to a pair of newlyweds and welcomed guests as they arrived to their home for the after party.
- Use a thin paintbrush and a contrasting color of paint to write the words. For our sample we traced sample letters from a local craft store. Feel free to do the same or freehand if you think you can handle it!
- Finally, allow plenty of drying time for your piece before displaying. If it is going to be outside for the season, a coat or two of polyurethane or sealant is advisable.
You can simply lean your sign on a solid surface to display or dig the legs of the headboard into the ground. Either way, you are sure to have a cool yard decor piece that everyone is sure to notice and of course, ask how you did it!
So get thrifting and get your hands on an old headboard such as this. Happy crafting!

Leave a Reply