• Home
  • About
    • Privacy Policy
  • Blog
  • Prep-Ahead Meals Cookbooks
  • Recipes
  • Lifestyle
  • Gardening
  • Kid’s Activities
  • Gluten-Free Recipes
  • Budgeting Tips
↑

Premeditated Leftovers™

Prep-Ahead Meals, Cooking Tips, and Frugal Living

  • Cookbooks
    • Prep-Ahead Breakfasts and Lunches
    • Prep-Ahead Meals From Scratch
  • Recipe Index
  • Members Area
    • Member Login
    • Join Us
  • Home
  • Blog
  • Recipes
  • Gluten-Free Recipes
  • Lifestyle
  • Garden
  • DIY
  • Kids
  • Budget

You are here: Home / Naturally Frugal Living / How to Tie-Bleach a T-Shirt

How to Tie-Bleach a T-Shirt

September 25, 2011 by Alea Milham 3 Comments

This post may contain affiliate links. Read our disclosure policy here.
1094 shares
  • Share
  • Tweet

Andrew was invited to a ’60’s party. The mom who invited us encouraged the kids to wear tie-dyed t-shirts. Andrew did not have a tie-dyed t-shirt or anything else in his wardrobe that would pass for  ’60’s attire, so I looked for dye when I went grocery store. I could not find any dye at my local stores and when I did find it in town it was $4.99 a bottle, so if I wanted to make a shirt with multiple colors it was going to be quite expensive. I was thinking of letting him go in his normal clothes when I got the idea to try tie-bleaching a shirt.

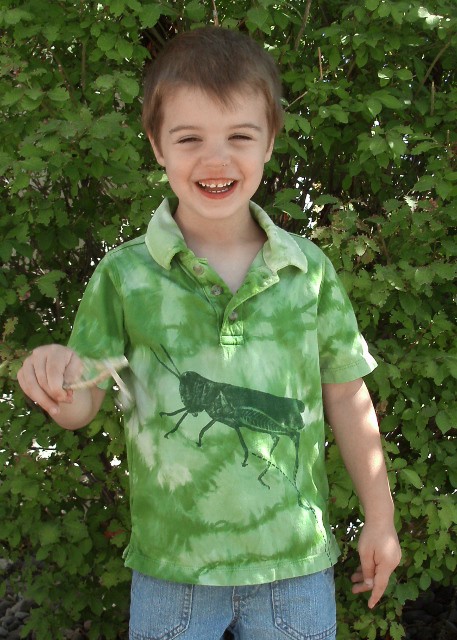
Andrew had a shirt that I wasn’t that fond of; it was a solid green with a dark green screen print grass hopper, so I decided to try tie-bleaching that shirt thinking that if I failed he would just have an ugly play shirt. But it turned out quite well, in fact, I like the shirt much better after tie-bleaching than I did before:
How to Bleach Fade clothing - tye-bleach method

When my daughter saw it, she asked me to tie-bleach a shirt for her.  I have a feeling this is how I will be extending the life of faded or stained items for a while.

How to Tie-Bleach a T-Shirt

You need:

a t-shirt (preferably all cotton)

a large bowl or sink with a stopper

bleach

rubber bands

Directions:

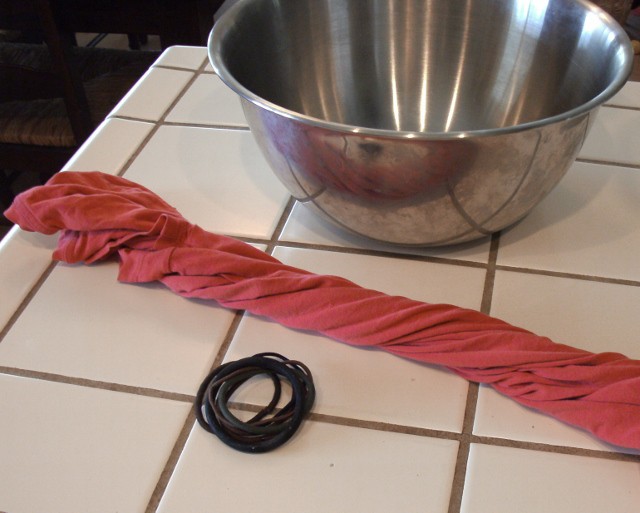
Roll your shirt up lengthwise.

Then twist and start putting rubber bands all over the shirt , twisting  the shirt again before adding each new rubber band. The area under the rubber band will remain darker.

Add 10 – 12 cups of water to a large bowl, add 1 – 1/2 cups of bleach to the water.

Place shirt in water carefully, you do not want to splash the clothes you are wearing. Push the shirt under the waster so it is entirely submersed.

Watch the shirt carefully as it lightens, pull it out when it has reached the desired color. This could take anywhere from 2 minutes to 15 minutes depending on the type of fabric and the effect you are trying to achieve.

Rinse immediately to stop the bleaching action. Wash and dry as usual.
reverse tie-dying - tie-bleaching

More Frugal DIY Ideas

  • How to Decorate Flip Flops with Ribbon
  • How to Hem Cut-Offs
  • How to Make a Burlap Hair Bows
  • How to Make a Monogrammed Back Pack
  • 3 Ways to Hem Cut-Offs
  • How to Make a Short Sleeve Shirt from a “Double” Sleeve Shirt
1094 shares
  • Share
  • Tweet

About Alea Milham

Alea Milham is the owner of Premeditated Leftovers and the author of Prep-Ahead Meals from Scatch. She shares her tips for saving money and time while reducing waste in her home. Her favorite hobby, gardening, is a frugal source of organic produce for her recipes. She believes it is possible to live fully and eat well while spending less.

Comments

  1. Christine says

    February 26, 2014 at 8:04 pm

    LOVE this, Alea! I am gonna have to do this to some of Jaeda’s shirts!

    Reply
  2. Rajani says

    September 27, 2011 at 1:12 pm

    I really love your son’s shirt!It looks really great 🙂

    Reply
  3. Barb @ A Life in Balance says

    September 27, 2011 at 4:13 am

    Love this idea! My daughter has a green shirt with some marks on the front. I was going to use a bleach pen to turn them into a design, however, I would need to buy a bleach pen. I always have bleach in stock.

    I’ll be sharing this on Pinterest!

    Reply

Leave a Reply Cancel reply

Your email address will not be published. Required fields are marked *

Recipe Rating


Search

Prep-Ahead Breakfasts and Lunches by Alea Milham

Recent Articles:

soothing face mist recipe

Homemade Soothing Summer Face Mist

Making the Most of Free Concerts in the Park

Making the Most of Free Concerts in the Park

7 Ways to Enjoy a Simpler Summer with your family this year.

7 Ways to Enjoy a Simpler Summer

Prep-Ahead Meals from Scratch Where to Buy

BROWSE:

  • Blog
  • Cookbooks
  • Recipe Index
  • Members Area

ABOUT:

  • About
  • Contact
  • Privacy Policy
  • Disclosure

Welcome. I'm Alea!

On Premeditated Leftovers I share simple recipes made with whole foods, practical shopping tips, time saving techniques, and meal planning strategies. I also share tips for minimizing food waste, so more of the food that is purchased ends up on the table.

While volunteering as a budget counselor, I realized that food is the element of most people’s budgets where they have the greatest control. I set out to develop low-cost recipes from scratch to prove it’s possible to create delicious meals on a limited budget. Eating well while spending less is about more than just creating recipes using inexpensive ingredients; it’s about creatively combining ingredients so you don’t feel deprived and are inspired to stick to your budget.

Copyright ©2025, Premeditated Leftovers™. All Rights Reserved.
Design by Pixel Me Designs