• Home
  • About
    • Privacy Policy
  • Blog
  • Prep-Ahead Meals Cookbooks
  • Recipes
  • Lifestyle
  • Gardening
  • Kid’s Activities
  • Gluten-Free Recipes
  • Budgeting Tips
↑

Premeditated Leftovers™

Prep-Ahead Meals, Cooking Tips, and Frugal Living

  • Cookbooks
    • Prep-Ahead Breakfasts and Lunches
    • Prep-Ahead Meals From Scratch
  • Recipe Index
  • Members Area
    • Member Login
    • Join Us
  • Home
  • Blog
  • Recipes
  • Gluten-Free Recipes
  • Lifestyle
  • Garden
  • DIY
  • Kids
  • Budget

You are here: Home / Naturally Frugal Living / Upcycled Gumball Machine Terrarium

Upcycled Gumball Machine Terrarium

February 23, 2016 by Jody 2 Comments

This post may contain affiliate links. Read our disclosure policy here.
485 shares
  • Share
  • Tweet

Upcycled Gumball Machine Terrarium- Repurpose an old gumball machine by turning it into a terrarium. Your plants will have a safe and decorative home!

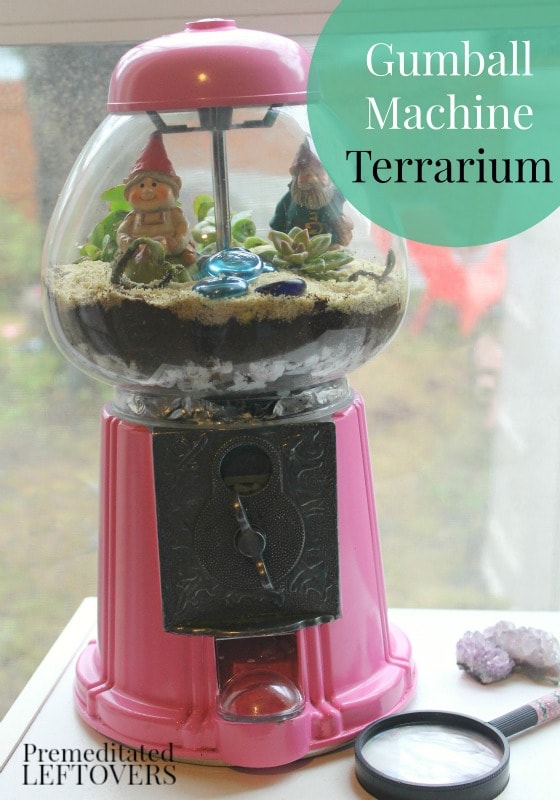
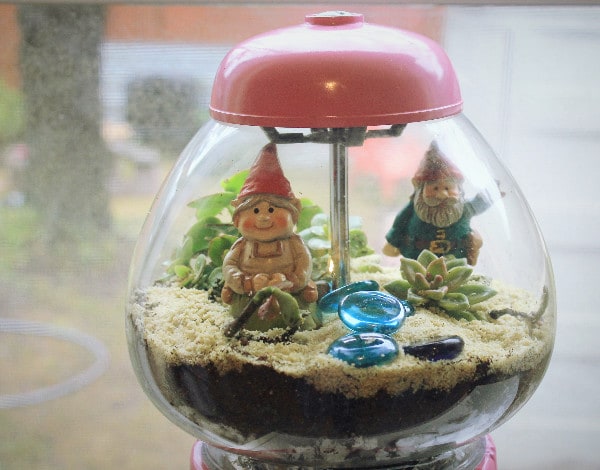
I picked up this cute and fun pink bubble gum machine at a yard sale a couple months ago. I knew I wasn’t going to fill it with candy of any sort, but I just knew I had to have it for something. So I bought it and I stared at it knowing that it needed a second life. Finally, inspiration hit. I love terrariums and pop them in mason jars and canisters. What if I took that idea and made a terrarium inside my gumball machine?  I was pretty pleased with how it came out. Now my Upcycled Gumball Machine Terrarium sits in a place of honor in front of the window on our science shelf.

Upcycled Gumball Machine Terrarium

Materials:

  • Gumball machine
  • Succulent plants
  • Soil
  • Sand
  • Small pebbles or rocks
  • Aluminum foil
  • Optional: gnomes, fairies, or other decorative miniatures

Directions:

1. Remove the top of gumball machine by taking off the top screw- this is easily done with a quarter, credit card, or flat head screwdriver.

2. Make a nest with the aluminum foil, pressing it into the cracks on the outside and in the center around the metal pole. Note: I am not planning on using my gumball machine later for food. If you are, you may wish to seal off the upper area a little better. This is my quick fix to keep the majority of water, rocks, and soil from getting inside the mechanisms.

Upcycled Gumball Machine Terrarium

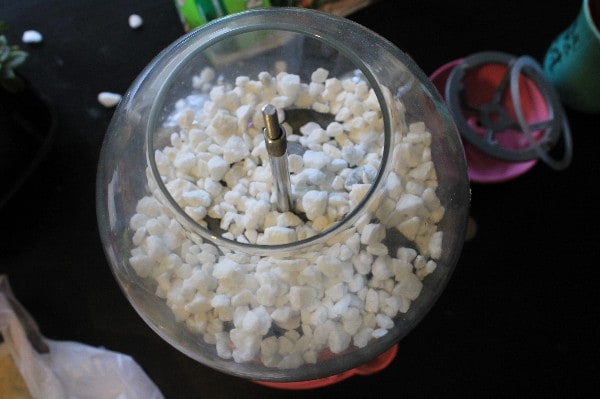
3. Next place a layer of small rocks or pebbles to help with drainage.

Upcycled Gumball Machine Terrarium

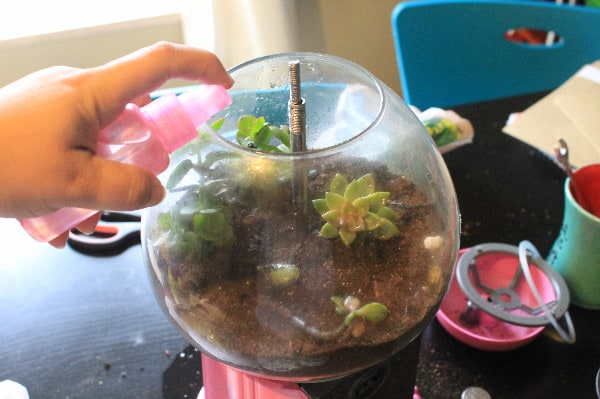
4. Place about 2″ of soil on top of pebbles, then place your succulents as desired.


5. Mist plants and soil lightly to dampen but not saturate.

Upcycled Gumball Machine Terrarium

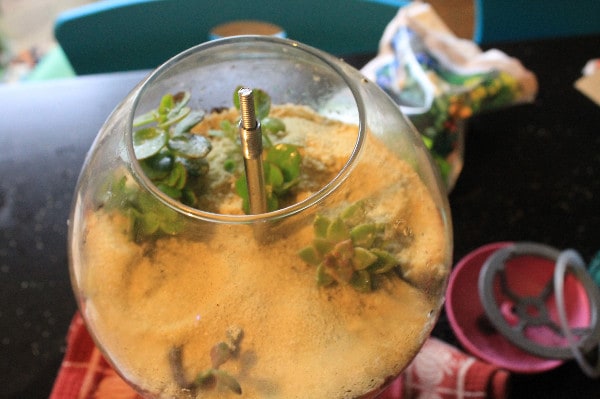
6. Cover with a 1/4″ layer of sand.

Upcycled Gumball Machine Terrarium

6. If you want to add a touch of whimsy to your terrarium you can add miniature fairies, gnomes, furniture, or other accessories. You can see we added in a gnome couple that we already had and made a stream right through the middle with some smooth glass beads.

Upcycled Gumball Machine Terrarium

7. Continue to mist occasionally with water, succulents do not need to be watered much or very often.

More Upcycled Planters:

DIY Magnetic Wine Cork Planters for Succulents

DIY Planter Box for Berries and Other Fruits

How to Make an Indoor Herb Planter from a Mail Sorter

DIY Easy Upcycled Chair Planter

Upcycled Soup Can Herb Planter

485 shares
  • Share
  • Tweet

Comments

  1. Aimee Martineau says

    April 12, 2017 at 5:34 pm

    Do you keep the lid on it all the time?

    Reply
  2. Dr. Elise Cohen Ho says

    February 24, 2016 at 4:34 pm

    This is absolutely precious. I adore the way you totally thought outside of the box.

    Reply

Leave a Reply Cancel reply

Your email address will not be published. Required fields are marked *

Recipe Rating


Search

Prep-Ahead Breakfasts and Lunches by Alea Milham

Recent Articles:

Mid-Summer Cleaning List

Mid-Summer Cleaning List

What to Buy in July

What to Buy in July – A List of Sale and Clearance Items

7 Ways to Save and Display Sea Glass- Sea glass is fun to collect and a great way to remember your favorite beaches. Here are 7 creative ways to display it.

7 Ways to Save and Display Sea Glass

Prep-Ahead Meals from Scratch Where to Buy

BROWSE:

  • Blog
  • Cookbooks
  • Recipe Index
  • Members Area

ABOUT:

  • About
  • Contact
  • Privacy Policy
  • Disclosure

Welcome. I'm Alea!

On Premeditated Leftovers I share simple recipes made with whole foods, practical shopping tips, time saving techniques, and meal planning strategies. I also share tips for minimizing food waste, so more of the food that is purchased ends up on the table.

While volunteering as a budget counselor, I realized that food is the element of most people’s budgets where they have the greatest control. I set out to develop low-cost recipes from scratch to prove it’s possible to create delicious meals on a limited budget. Eating well while spending less is about more than just creating recipes using inexpensive ingredients; it’s about creatively combining ingredients so you don’t feel deprived and are inspired to stick to your budget.

Copyright ©2023, Premeditated Leftovers™. All Rights Reserved.
Design by Pixel Me Designs