
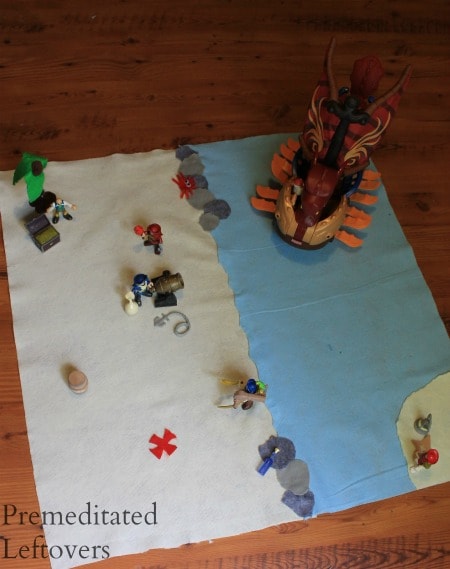
We have tons of play figures: Playmobile, Imaginext, and a host of other “guys” that my son plays with on a daily basis. He has amassed quite a few of the buildings and vehicles that go with them as well from Christmas, birthdays, and garage sales. Yet even with all these toys, boredom sets in. The problem is that they are not really open ended. Even though this play mat I created has a theme to it, it still leaves a lot open to imagination. This is a simple no sew felt play mat that can be used with any toys you have on hand- Play mobile or Imaginext figures, mermaids, Barbies, or even Toob sea creatures. Right now felt is our favorite medium since it is so inexpensive. A 1/2 yard piece cost me a little over $2.00, and the possibilities of what you can do with it are limitless. Plus, we only used half that piece, so I can make another play mat for a homemade Christmas gift or birthday gift . It was almost as much fun for me to make as it is for the kids to play with.
DIY No Sew Pirate Play Mat
Supplies Needed:
- 1/2 yard cream felt
- 1/2 yard blue felt
- Assorted colors felt squares-I used dark brown, light brown, red, green, and 2 shades of grey.
- Red chenille stem/pipe cleaner
- Googly eyes
- Paper straw
- Glue gun/sticks
Directions:
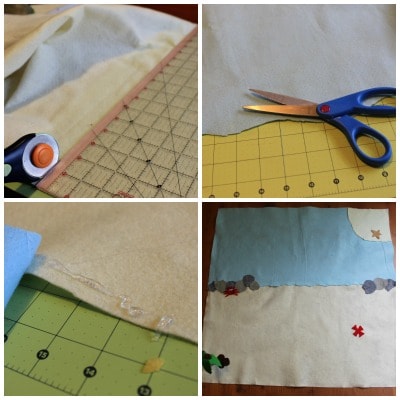
I started by cutting my felt in half. In order to get a sheet that was long enough I had to get 1/2 yard, which is 45″ wide, and we didn’t want our mat quite that big. I used my rotary cutter and self healing mat to cut the cream colored felt. If you don’t have one simply cut with scissors. For the water, I cut a 1/2 yard piece of blue felt in half and used scissors to cut an uneven line to resemble the shoreline. Run hot glue about 1/4″ from the edge of your cream colored felt a couple inches at a time so it does not harden before you can attach it securely to the blue felt. Then place one piece of cream felt in the corner of the blue felt, trim it so that it fits, and round off the side facing the water to create an island.
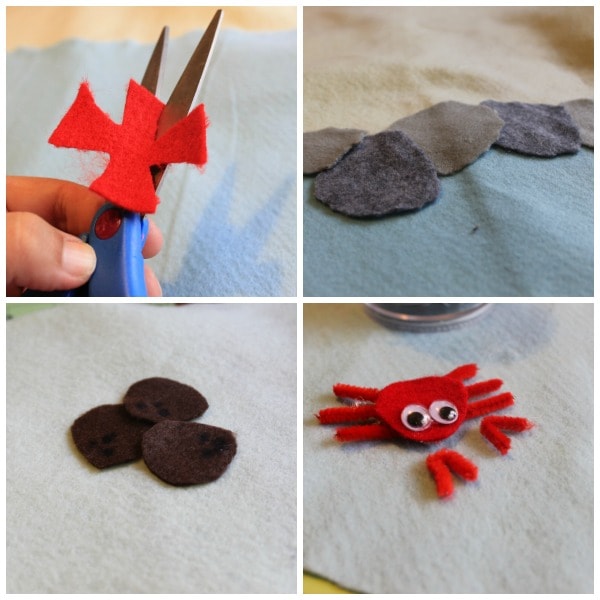
Now the real fun begins as you add accents and details. I asked my son what features his pirate island needed to include. Well of course an X to mark the spot, which was easily cut free hand from a piece of red felt. I made rocks for landing pirate ships safely on the shore from 2 different shades of grey felt cut into random rock shapes. Brown felt coconuts with the black dimples added in with my trusty sharpie. And of course, a couple sea creatures to set the mood- red felt for the body of our crab, small pieces of chenille stem hot glued on for legs and pincers, and while I wasn’t going for whimsical and wanted a realistic looking pirate mate I couldn’t resist adding google eyes to the crab, isn’t he sweet?
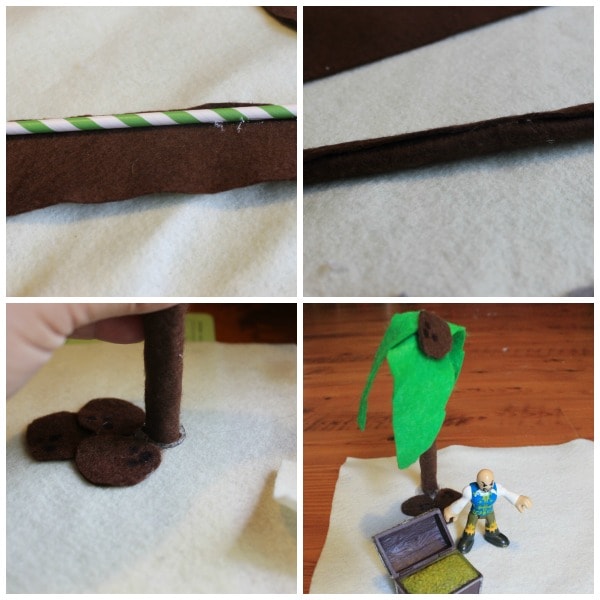
Of course, a pirate island needs a coconut tree. I wanted most of the features of mat to be flat so that the mat could be rolled up for easier storage, but the tree needed to be upright. I cut a piece of dark brown felt to the same length as my straw and about 2″ wide. Run a bead of hot glue down your felt on the length right at the edge, place your straw in the glue, allow it to dry for a minute, roll the felt around the straw until you reach the end. Run a new bead of glue at the end and press felt down securely. Decide where you want your palm tree, make a thick puddle of hot glue about the circumference of the base of your straw trunk. Press and hold end of trunk into hot glue until it hardens. Cut fronds from green felt and glue to the top. If the glue at the base bothers you it can be covered in a pile of coconuts, we just added a few to the ground and one to the top for an accent. I created this mat a couple weeks ago, it has been played with folded, thrown crumpled up on the floor, and kicked around quite a bit and the palm tree still pops up for play no problem so far.
Since this toy is on the floor a lot and well, its felt, it gathers dust, dirt, and pet hair. A quick shake removes most of it and a couple turns with a rolling lint remover does the rest. No matter how many bright, noisy store bought toys are in our home this play mat has ruled to roost as most played with these past couple weeks.
More DIY Gifts for Kids
DIY Construction Site Travel Box
10 DIY Christmas Gifts for Girls
10 DIY Christmas Gifts for Boys

Leave a Reply