• Home
  • About
    • Privacy Policy
  • Blog
  • Prep-Ahead Meals Cookbooks
  • Recipes
  • Lifestyle
  • Gardening
  • Kid’s Activities
  • Gluten-Free Recipes
  • Budgeting Tips
↑

Premeditated Leftovers™

Prep-Ahead Meals, Cooking Tips, and Frugal Living

  • Cookbooks
    • Prep-Ahead Breakfasts and Lunches
    • Prep-Ahead Meals From Scratch
  • Recipe Index
  • Members Area
    • Member Login
    • Join Us
  • Home
  • Blog
  • Recipes
  • Gluten-Free Recipes
  • Lifestyle
  • Garden
  • DIY
  • Kids
  • Budget

You are here: Home / Naturally Frugal Mom / How to Make Peg Doll Fairies

How to Make Peg Doll Fairies

September 8, 2016 by Jody 3 Comments

This post may contain affiliate links. Read our disclosure policy here.
317 shares
  • Share
  • Tweet

Does your child like fairies? Here is a tutorial demonstrating how to make Peg Doll Fairies from small wood doll body pieces.

Here is a fun tutorial on How to Make Peg Doll Fairies. Add acorns and leaves to create a fall woodland theme to each little fairy in your garden.

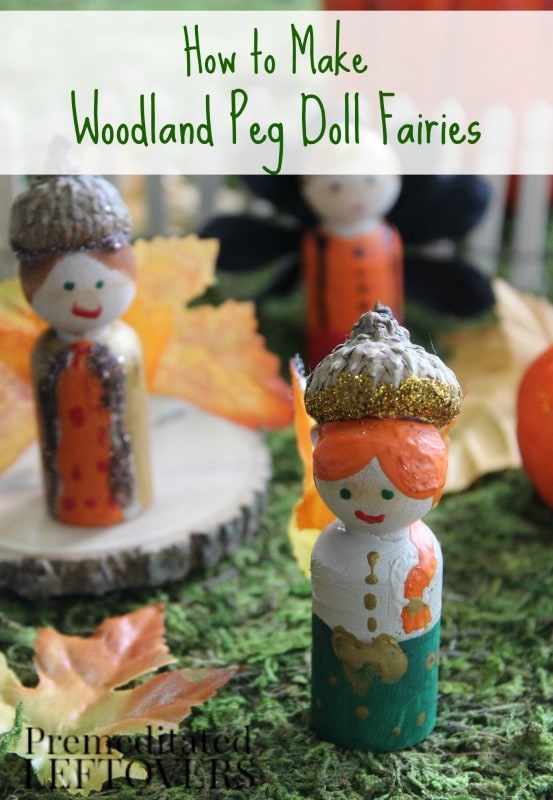
My little girl and I love to make fairy gardens all year round in every theme that we can think of. It’s a wonderfully therapeutic, creative, and bonding activity. This time, we decided to try our hand at making peg doll fairies to go in our gardens. How fun it is to create different fairies from the blank canvass of a plain wooden peg.

If you want to learn How to Make Peg Doll Fairies just keep reading below and see how we made our own woodland sprites to visit our fairy gardens. While we purchased most of our supplies or already had them on hand, we added a natural touch by gathering acorn caps from the yard.

Peg Doll Fairies Tutorial
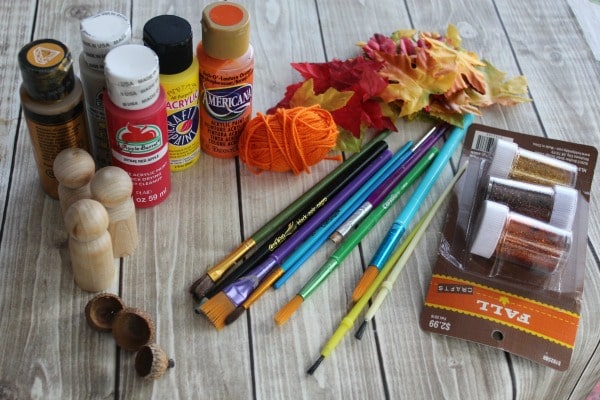
Materials Needed:

  • wooden peg dolls
  • acrylic paint
  • paintbrushes in various sizes
  • silk leaves or flowers
  • hot glue gun/sticks
  • optional-glitter, string, acorn caps

How to Make Peg Doll Fairies- supplies needed

Instructions:

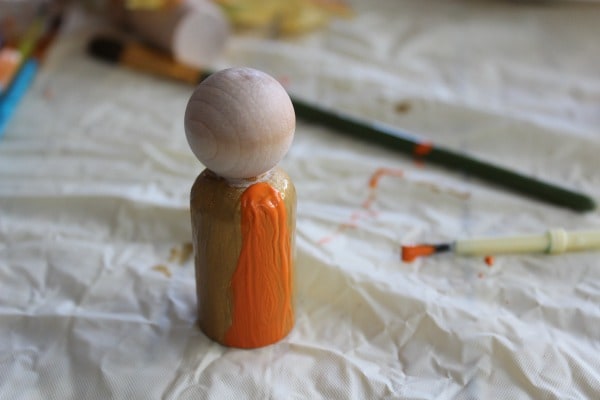
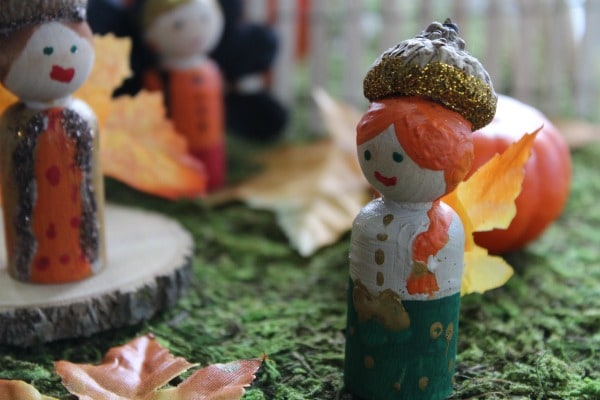
1. Begin by painting the body of your fairy with a small brush. You can either paint a solid dress or get a little fancy and create something more detailed. For one of mine I made a top and skirt. Another was made with a dress with a robe over it, and my boy fairy got shorts and a top. If you are nervous about free hand painting your fairy or you have a little one who gets a little exuberant with the paint, you can cover the parts you don’t want painted yet with painters tape.

How to Make Peg Doll Fairies- paint on clothing

2. Allow the body of your fairy to dry then move on to the head. To add hair to the top you can add some texture by carefully rolling the head in paint and using different brushes to create various brush strokes. To make the tiny eyes use the opposite end of your paintbrush to add small dots.


3. While your head is drying you can go back to the body to add some detail. Use your small paintbrush handle end to create polka dots or buttons. Then, draw on designs with craft glue and add glitter for a little sparkle.

How to Make Peg Doll Fairies- add detail

4. Make these fun acorn hats or crowns by dipping the bottom in glue then dip it in fine glitter. Allow to dry completely and hot glue to the top.

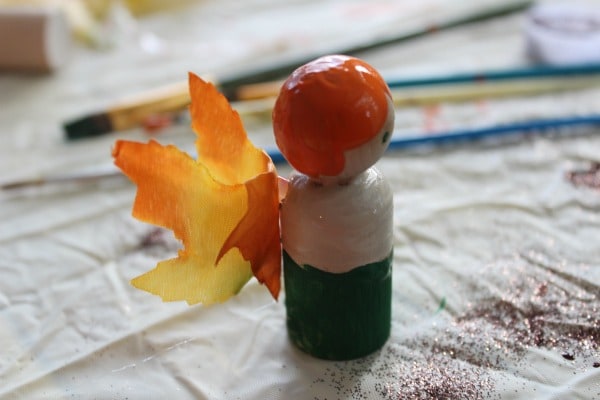
5. To create fall woodland fairies use silk fall leaves for wings. Otherwise, you can deconstruct silk flowers and use the petals or leaves of those as well. Simply fold down the top point of the leaf to create a wing shape.

6. Bend the leaf or flower in the center vertically and affix to the back of your peg doll fairy.

How to Make Peg Doll Fairies- add leaf for wings

7. Have fun with your fairies and make them all different. Change up their hair, eyes, outfit, and wings to create a unique fairy community.

How to Make Peg Doll Fairies- fairies in garden

These little fairy peg dolls are so addicting we will be making some for every season!

More Fall Crafts for Kids:

Apple Stamping Craft

Paper Plate Apple Craft for Kids

DIY Chenille Apple Craft for Kids

Scrapbook Paper Pumpkin Craft

15 Pumpkin Crafts and Activities for Kids

15 Fall Leaf Crafts for Children

317 shares
  • Share
  • Tweet

Comments

  1. Shirley Wood says

    September 15, 2016 at 12:16 pm

    This is the very reason why I love blogging. Bloggers are so creative. Love this. So glad you share with us at Merry Monday.

    Reply
  2. Hil says

    September 13, 2016 at 11:09 am

    That’s so cute! I love the leaf as wings idea. Too cute!

    Reply
  3. Ann Nell says

    September 9, 2016 at 5:51 pm

    I love these !!

    Reply

Leave a Reply Cancel reply

Your email address will not be published. Required fields are marked *

Recipe Rating


Search

Prep-Ahead Breakfasts and Lunches by Alea Milham

Recent Articles:

Clothespin nativity scene with a Popsicle stick stable

Clothespin Nativity Scene with a Popsicle Stick Stable

DIY Flower Pot Nativity Set- This is such a sweet and simple way to make your own Nativity set. It is also a Christmas craft your children are sure to love.

DIY Flower Pot Nativity Set

DIY Snowman in a Jar Kit- This simple craft makes a great homemade gift for kids. It includes everything they need to build their own jolly snowman outside!

DIY Snowman Kit in a Jar

Prep-Ahead Meals from Scratch Where to Buy

BROWSE:

  • Blog
  • Cookbooks
  • Recipe Index
  • Members Area

ABOUT:

  • About
  • Contact
  • Privacy Policy
  • Disclosure

Welcome. I'm Alea!

On Premeditated Leftovers I share simple recipes made with whole foods, practical shopping tips, time saving techniques, and meal planning strategies. I also share tips for minimizing food waste, so more of the food that is purchased ends up on the table.

While volunteering as a budget counselor, I realized that food is the element of most people’s budgets where they have the greatest control. I set out to develop low-cost recipes from scratch to prove it’s possible to create delicious meals on a limited budget. Eating well while spending less is about more than just creating recipes using inexpensive ingredients; it’s about creatively combining ingredients so you don’t feel deprived and are inspired to stick to your budget.

Copyright ©2023, Premeditated Leftovers™. All Rights Reserved.
Design by Pixel Me Designs