• Home
  • About
    • Privacy Policy
  • Blog
  • Prep-Ahead Meals Cookbooks
  • Recipes
  • Lifestyle
  • Gardening
  • Kid’s Activities
  • Gluten-Free Recipes
  • Budgeting Tips
↑

Premeditated Leftovers™

Prep-Ahead Meals, Cooking Tips, and Frugal Living

  • Cookbooks
    • Prep-Ahead Breakfasts and Lunches
    • Prep-Ahead Meals From Scratch
  • Recipe Index
  • Members Area
    • Member Login
    • Join Us
  • Home
  • Blog
  • Recipes
  • Gluten-Free Recipes
  • Lifestyle
  • Garden
  • DIY
  • Kids
  • Budget

You are here: Home / Naturally Frugal Mom / Unicorn Ornament

Unicorn Ornament

November 6, 2018 by Jody Leave a Comment

This post may contain affiliate links. Read our disclosure policy here.
264 shares
  • Share
  • Tweet

Every little girl dreams of sparkling unicorns with gorgeous rainbow manes right? Unicorns are popping up everywhere and Christmas is no different.

homemade unicorn ornaments using a clear Christmas ball ornament

Your little one can create a magical Unicorn Ornament that will bring some homemade sparkling beauty to your tree and to their eyes!  You can create a herd and put them on the Christmas Tree, attach them to gifts, or give them as gifts. Unicorn ornaments are a unique idea for this year’s ornament exchange party!

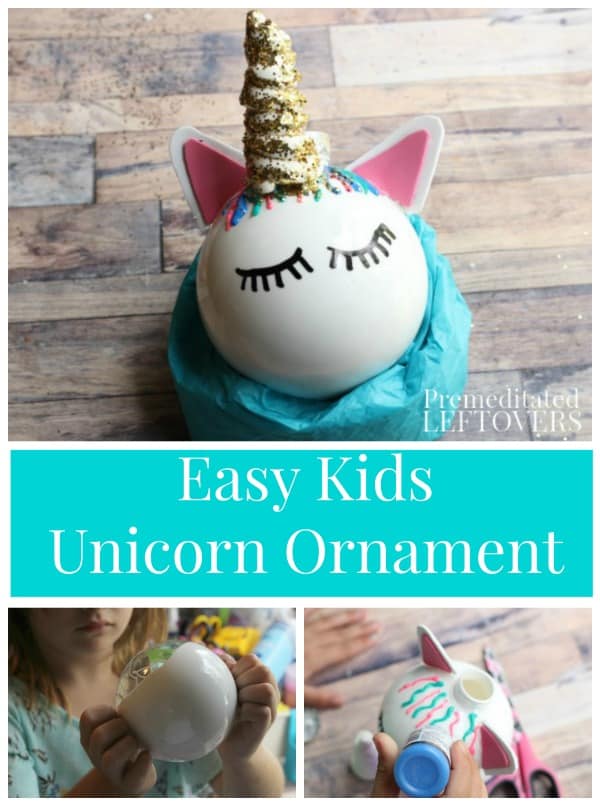
Kids Easy Unicorn Ornament

You will need:

  • Plastic ball ornament
  • Puffy fabric paint
  • Pink and white craft foam
  • White craft paint
  • Black paint pen (or sharpie)
  • White model magic
  • Glitter-optional
  • Clear craft glue
  • Plastic cup
  • Hot glue gun/sticks

Directions:

You can get a box of plastic ball ornaments or buy them individually at any craft store, we bought an oversized single for this unicorn.

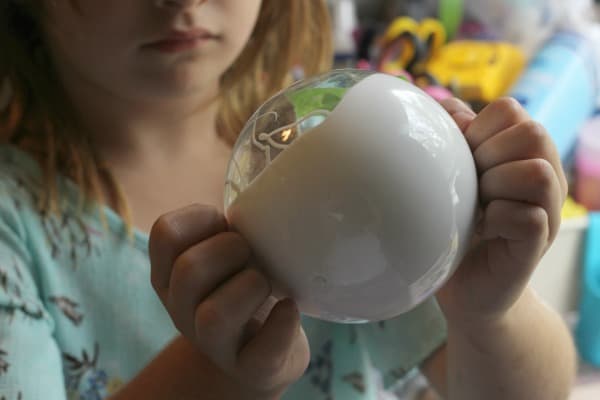
  1. Remove the hanger and cap from your plastic ornament, squeeze a tablespoon or so of white craft paint inside. Cover the opening with tape and shake and roll until completely coated inside, you may need to add paint a few times to get it thoroughly covered. 
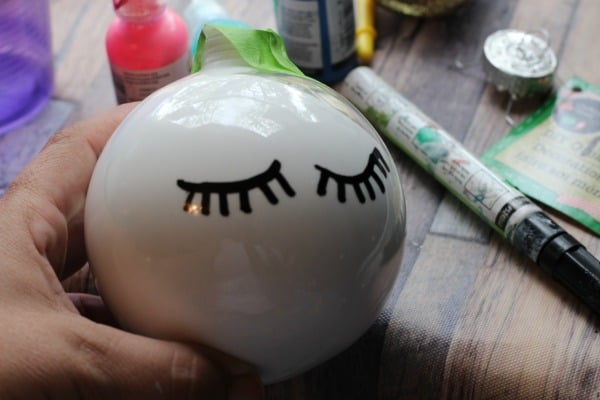
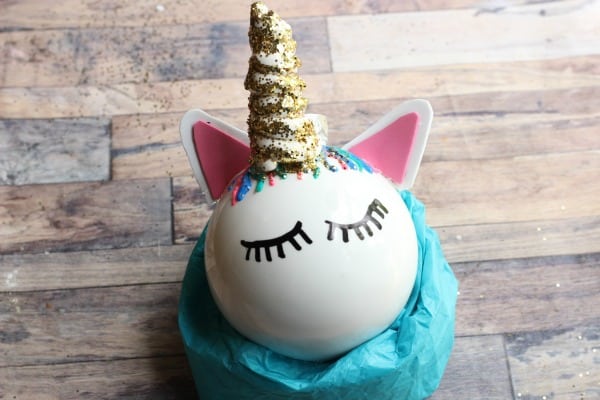
  2. Draw on some pretty eyelashes with your black paint pen or sharpie.
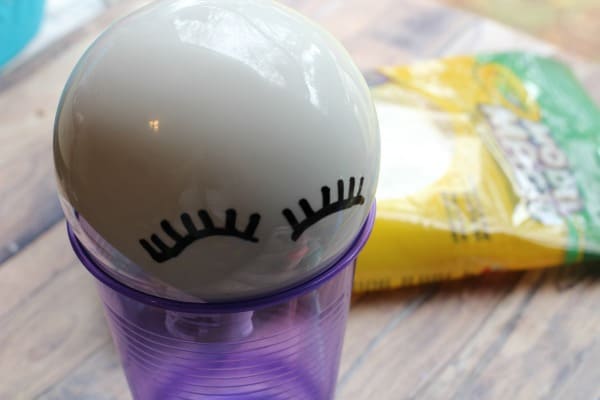
  3. Turn your ornament upside down on a cup and let the excess paint drip and dry out overnight. (sometimes, when we feel impatient we finish the rest and let them dry upside down after we have done the rest of the decorating.
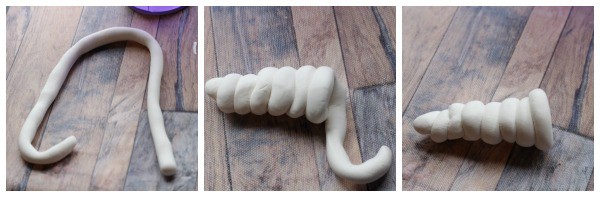
  4. While you let the excess paint drip out you can get started on the unicorn’s horn.  Roll model magic out into a thin snake shape. Begin at the top and coil it up, getting larger as you  go down until you have made a horn shape of the size you like.                          
  5. If your want to add a little sparkle squeeze some glue onto the horn and sprinkle with glitter, set aside to dry. Your horn will take 3 days to dry out completely but we have found painting or adding glue still allows it to dry just fine.
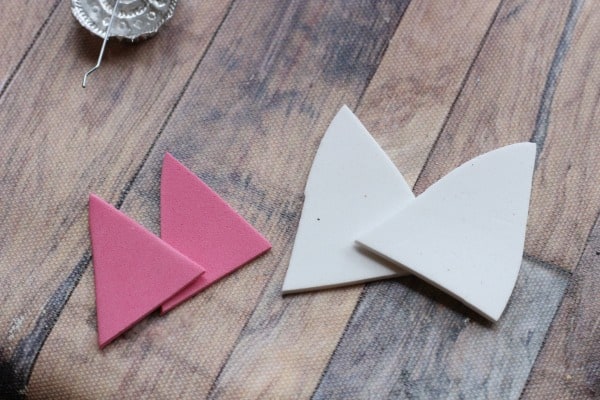
  6. Cut two white triangles and two smaller pink triangles to create ears, slightly round the corners.  Hot glue on either side of the opening of your Christmas ornament.
  7. To complete your unicorn use puffy paint to draw on her forelock, you can add a mane to the back if you like as well.
  8. Once your paint is dry inside you can replace the cap and hanger.

Isn’t this a fun gift idea for the unicorn lover on your Christmas list?


More Homemade Ornaments

Cross Ornament Craft for Kids

Snowman Christmas Ornament Craft

DIY Canning Jar Lid Wreath Ornament

264 shares
  • Share
  • Tweet

Leave a Reply Cancel reply

Your email address will not be published. Required fields are marked *

Recipe Rating


Prep-Ahead Breakfasts and Lunches by Alea Milham

Search

Prep-Ahead Meals from Scratch Where to Buy

Recent Articles:

diy dirt slime recipe

Garden Dirt Slime Recipe

25 Ideas for Summer Boredom Boxes - Here are 25 ideas to keep your kids occupied this summer - perfect for days when your kids can't think of anything to do.

25 Ideas for Summer Boredom Boxes

homemade firecracker sidewalk chalk and american flag

DIY Firecracker Sidewalk Chalk

BROWSE:

  • Blog
  • Cookbooks
  • Recipe Index
  • Members Area

ABOUT:

  • About
  • Contact
  • Privacy Policy
  • Disclosure

Welcome. I'm Alea!

On Premeditated Leftovers I share simple recipes made with whole foods, practical shopping tips, time saving techniques, and meal planning strategies. I also share tips for minimizing food waste, so more of the food that is purchased ends up on the table.

While volunteering as a budget counselor, I realized that food is the element of most people’s budgets where they have the greatest control. I set out to develop low-cost recipes from scratch to prove it’s possible to create delicious meals on a limited budget. Eating well while spending less is about more than just creating recipes using inexpensive ingredients; it’s about creatively combining ingredients so you don’t feel deprived and are inspired to stick to your budget.

Copyright ©2022, Premeditated Leftovers™. All Rights Reserved.
Design by Pixel Me Designs
264 shares