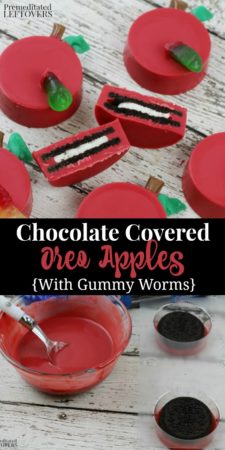
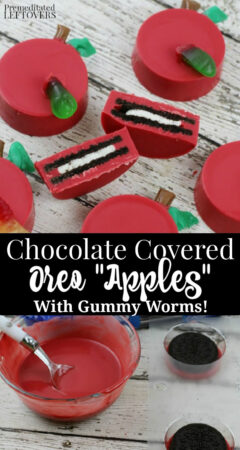
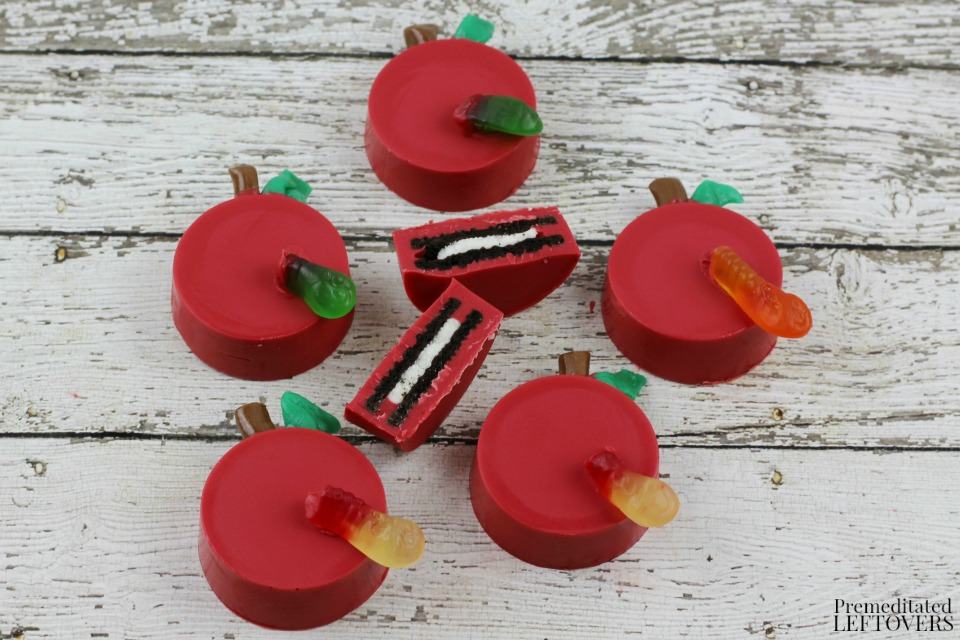
These chocolate-covered Oreo apples with candy worms make a great back-to-school treat!
If you are looking for a fun back-to-school treat, look no further than these chocolate-covered Oreo apples. They are easy to make using Oreos, red white chocolate pieces, and various candies. They are perfect for back-to-school events, or just celebrating the first day of school with your kids.
We used traditional chocolate Oreos, but you can use your favorite flavor. These would be fun with Apple Flavored Oreos when they come out this fall!
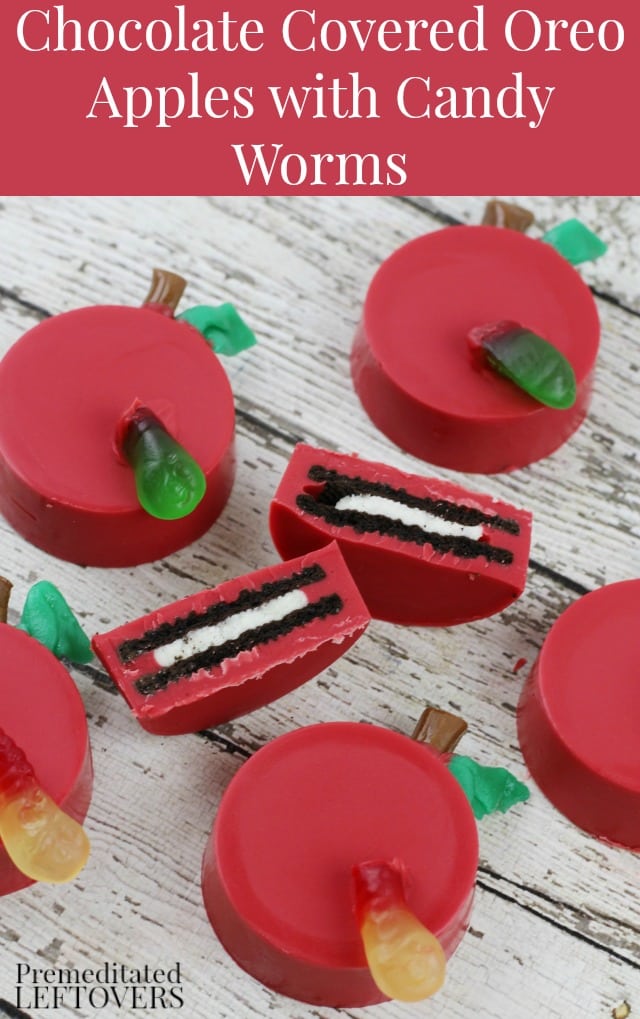
Chocolate Covered Oreo Apples with Candy Worms
Supplies Needed:
- Candy/Cookie mold (You either need 2 or must duplicate the process)
- 2 Tablespoons solid shortening
- 3/4 cup Wilton red chocolate melts
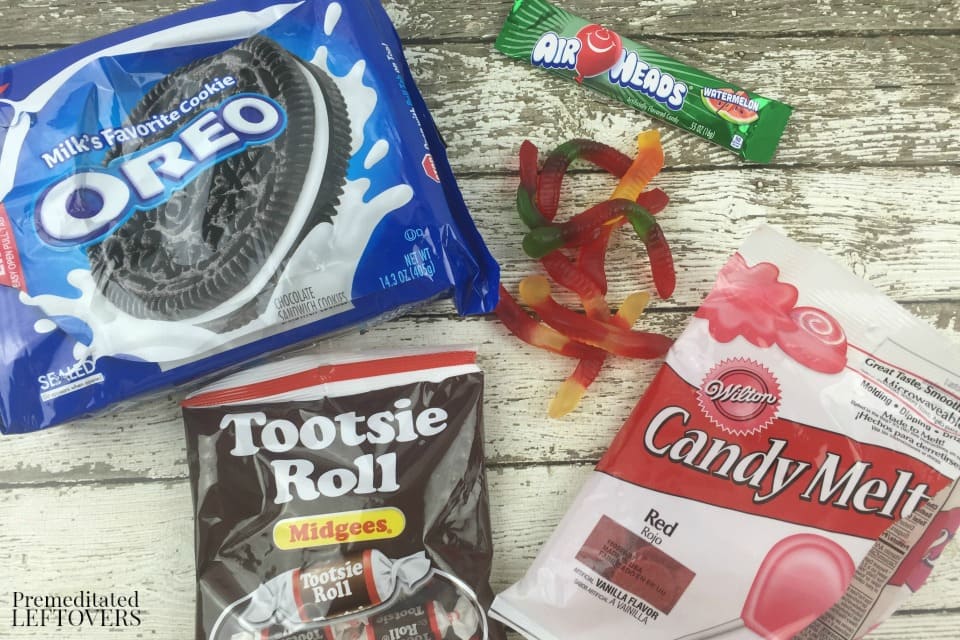
- 12 Oreos
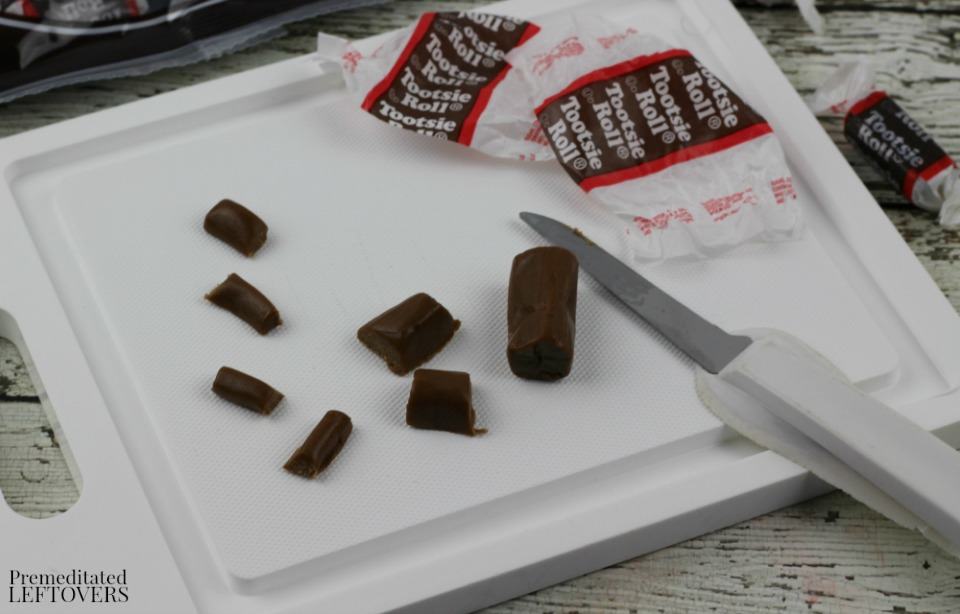
- 3 mini chocolate tootsie roll candies
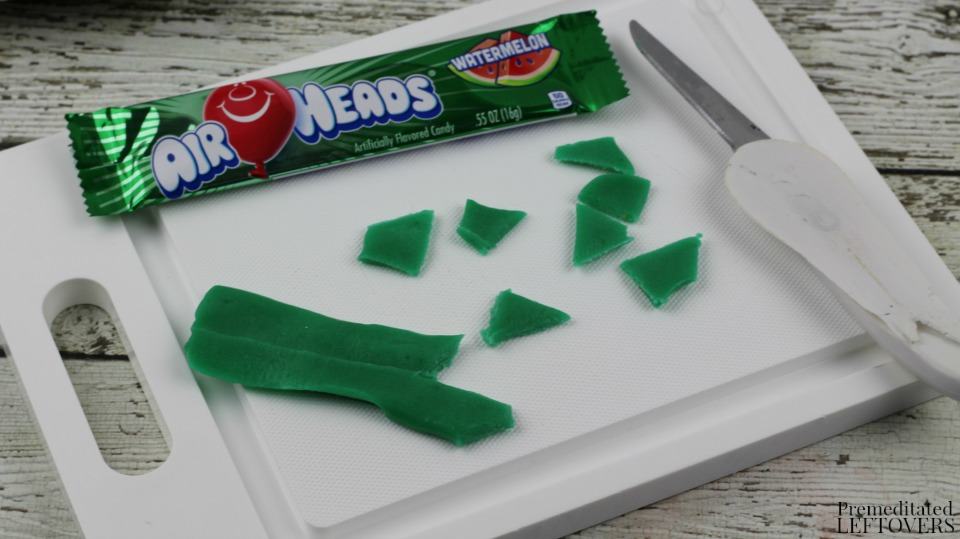
- 1 large green Airhead candy
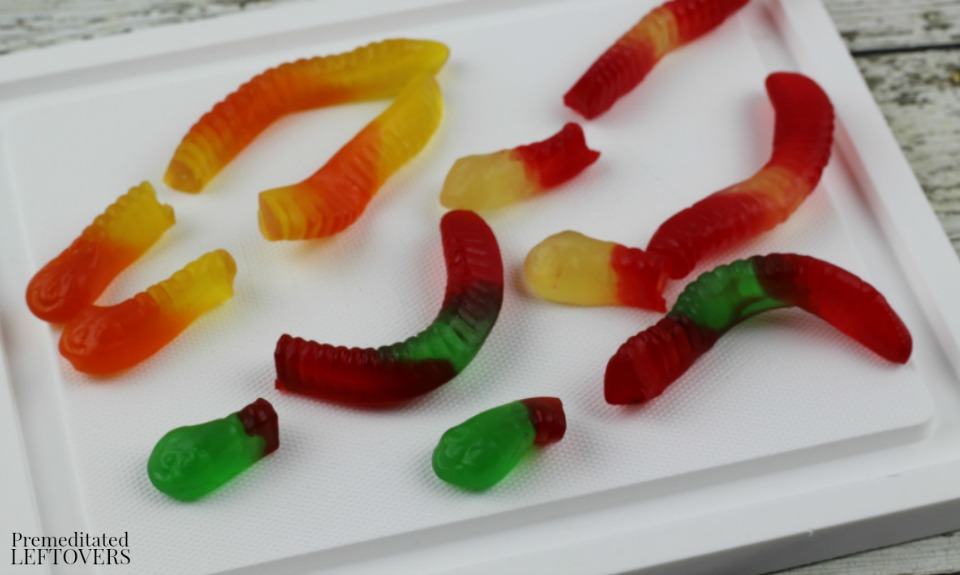
- 12 gummy worms
How to Make Chocolate Covered Oreos:
1. In a microwave-safe bowl, microwave the shortening for 45 seconds or until melted.
2. Add the red chocolate melts and stir until melted. (Depending on microwave wattage, you may have to microwave in additional 10-second intervals until completely smooth and melted).
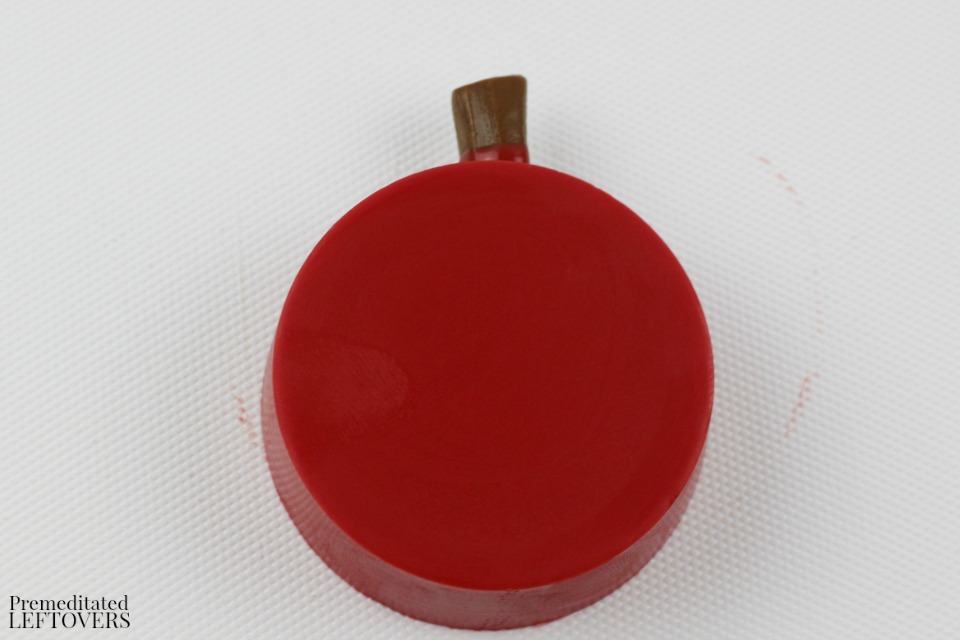
3. Pour 1 Tablespoon of the melted red chocolate into each mold.

4. Lay an Oreo cookie in each mold, on top of the melted chocolate.
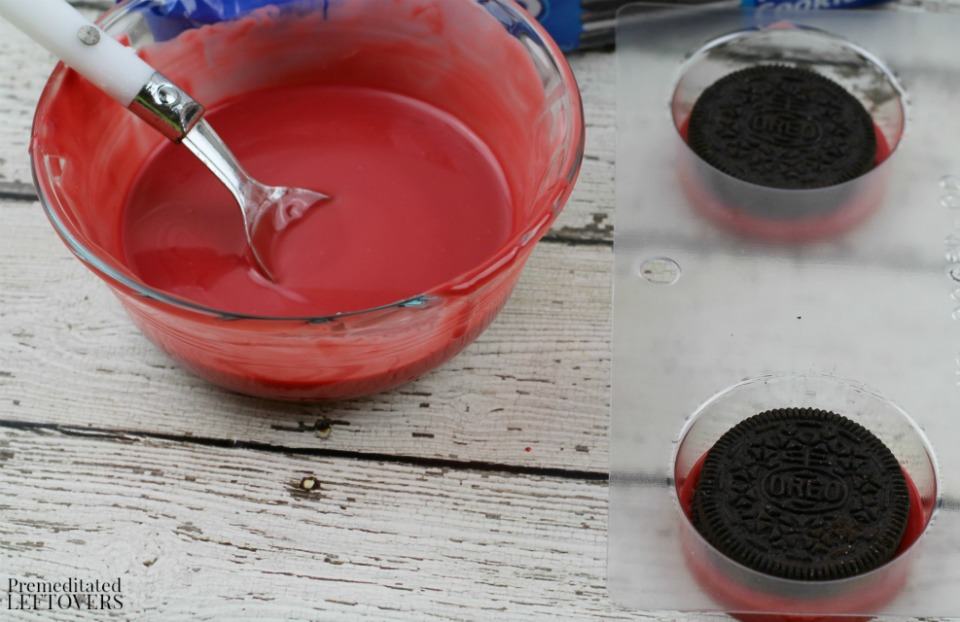
5. Spoon additional melted chocolate on top of each Oreo, filling the mold to the top. Set aside any leftover melted chocolate for use later in the recipe.
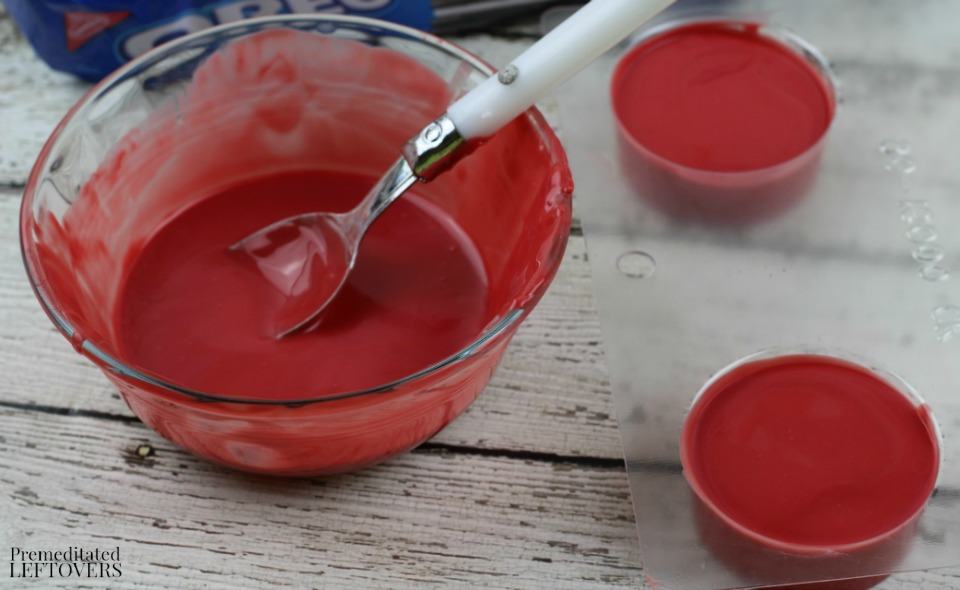
6. Chill for at least 2 hours.
Prep Work for Chocolate Covered Oreo Apples:
1. Line a baking sheet with wax paper and set aside.
2. Cut each tootsie roll in half and then slice each half again to get 4 pieces per roll (12 total). Set aside. These will be the apple stems.
3. With a knife or scissors, cut the Airhead in half, lengthwise.
4. Cut 6 triangles from both strips (12 total) and set aside. These will be the apple leaves.
5. Cut the ends off of each gummy worm and set aside.
How to Assemble Chocolate Covered Oreo Apples:
1. Pop Oreos out of their mold and lay on baking sheet.
2. Re-microwave the remaining melted chocolate that has hardened.
3. Dip each piece of “apple stem” into the melted chocolate and press gently onto the top of each Oreo cookie. Place back on the baking sheet to harden.
4. Take each Airhead triangle and bend it into the shape of a leaf. Dip into the melted chocolate and press gently on top of each Oreo next to the stem. Placed back on the baking sheet to harden.
5. Dip the ends of each gummy worm into the melted chocolate and press it onto the face of each Apple Oreo. Place back on the baking sheet for at least 30 minutes to harden.
6. Enjoy!!
Printable Recipe for Chocolate Covered Oreo Apples with Candy Worms

Chocolate Covered Oreo Apples with Candy Worms
Ingredients
- 12 Oreos
- 2 Tablespoons solid shortening
- 3/4 cup Wilton red chocolate melts
- 3 mini chocolate tootsie roll candies
- 1 large green Airhead candy
- 12 gummy worms
Instructions
HOW TO MAKE CHOCOLATE COVERED OREOS
- In a microwave safe bowl, microwave the shortening for 45 seconds or until melted.
- Add the red chocolate melts and stir until melted. (Depending on microwave wattage, you may have to microwave in additional 10 second intervals until completely smooth and melted).
- Pour 1 Tablespoon of the melted red chocolate into each mold.
- Lay an Oreo cookie in each mold, on top of the melted chocolate.
- Spoon additional melted chocolate on top of each Oreo, filling the mold to the top. Set aside any leftover melted chocolate for use later in the recipe.
- Chill for at least 2 hours.
PREP WORK FOR APPLE OREOS
- Line a baking sheet with wax paper and set aside.
- Cut each tootsie roll in half and then slice each half again to get 4 pieces per roll (12 total). Set aside. These will be the apple stems.
- With a knife or scissors, cut the Airhead in half, lengthwise.
- Cut 6 triangles from both strips (12 total) and set aside. These will be the apple leaves.
- Cut the ends off of each gummy worm and set aside.
HOW TO ASSEMBLE APPLE OREOS
- Pop Oreos out of their mold and lay on baking sheet.
- Re-microwave the remaining melted chocolate that has hardened.
- Dip each piece of "apple stem" into the melted chocolate and press gently onto the top of each Oreo cookie. Place back on the baking sheet to harden.
- Take each Airhead triangle and bend it into the shape of a leaf. Dip into the melted chocolate and press gently on top of each Oreo next to the stem. Placed back on the baking sheet to harden.
- Dip the ends of each gummy worm into the melted chocolate and press onto the face of each Apple Oreo. Place back on the baking sheet for at least 30 minutes to harden.
More Recipes Using Oreo Cookies
Cookies and Cream Rice Krispy Treats
Oreo Peanut Butter Rice Krispy Treats
Patriotic White Chocolate Oreos
Oreo and White Chocolate Coated Apples


Barbara Finnical says
Oh my goodness, these are adorable! My kids are grown but I am pinning this for somewhere in the future. So clever!
Samantha says
How far in advance could you make these? I wasn’t sure if the candy on the outside would harden?
Alea Milham says
You can make them 2 – 3 days ahead of time.
Kim @ Sand & Sisal says
Absolutely adorable! i love your idea of using a mold instead of dipping them. They look so professional. Any kid (or mom) would love these!
Emily @ Simple Life of a Fire Wife says
This is so cute!! Thanks for sharing at Inspire Me Monday! You are featured this week!
Karly says
These are adorable! Thanks for linkin’ up with What’s Cookin’ Wednesday!
Melanie says
How cute! These would be great for an “apple of my eye” baby shower theme!
Kim Six says
These are fabulous! I’ll be featuring them monday on You’re Gonna Love it! Thanks so much for linking up!
Sahana says
What a fun idea! So cute. Thank you for sharing with us at #HomeMattersParty. We would love to have you again next week.
Candace says
This gave me such a great idea for my daughter’s birthday – thank you! These came out awesome and look so cute. Thanks for sharing on Wonderful Wednesday blog hop.
Lois @Walking on Sunshine Recipes says
Thank you for joining Delicious Dishes Recipe Party this week! We pinned your recipe to our board! Hope to see you again next week!
Stacey Keeling says
You had me at Oreos! Thank you for sharing at Thoughts of Home on Thursday. Pinning. 🙂
Anita says
What a fantastic idea! Thanks for sharing.
Donna @ Modern on Monticello says
These are almost too cute to eat. I’m not sure what I will ever need the recipe for but I’m pinning it just in case I need it one day. Thanks for sharing.
Shirley Wood says
What a fun and clever back to school treat! They’re almost too cute to eat. Pinning. Thanks for sharing with us at Merry Monday.
Kim says
What a cute idea! A great teacher’s gift too!
Jessy @ The Life Jolie says
These are too cute- my daughter would get such a kick out of them!
Patty says
I just found your blog and now I am a new subscriber. I read to children during the school year and I am always looking for new treats to make for them. These “apples” will be perfect. I have always had a problem making anything chocolate covered because I never knew about these molds. They will be the first thing I purchase at the store. Thanks for sharing and I look forward to more treats.