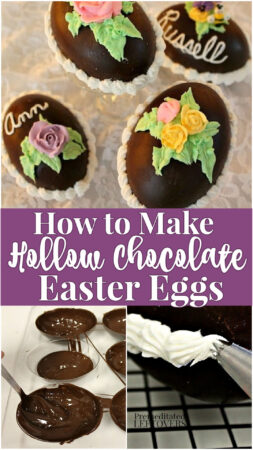
Use this tutorial on how to make hollow chocolate Easter eggs to make your own candy eggs this year!

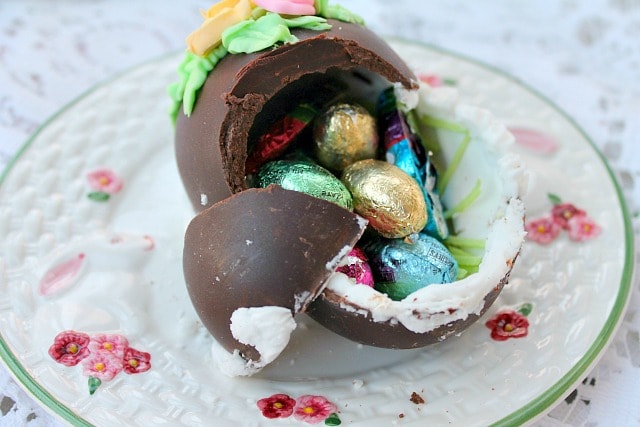
Here’s an Easter treat that is decorative, delicious, and filled with whatever you please. A hollow chocolate egg can hold jelly beans, chocolate eggs, marshmallow bunnies, or even money. You can even leave both sides of the egg in the molds while you fill them with fudge, and then assemble the egg once the fudge is set.
Decorate the outside of a large chocolate egg with candy flowers and leaves, or little figurines made of sugar, and use as a centerpiece. Everyone will have fun breaking it open after the meal to see what goodies are inside.
Tips for Making Hollow Chocolate Eggs
The simplest way to make a hollow chocolate egg is by using melting wafers (or candy melts), which don’t require tempering. They’re tasty and easy to use. If you prefer to use real chocolate, you will need to either refrigerate the eggs until you’re ready to use them, or temper the chocolate, which is a way of stabilizing the chocolate so the fats don’t rise to the surface and turn the chocolate an unsightly white. There are many methods described on the Internet that don’t require special equipment other than a digital thermometer.
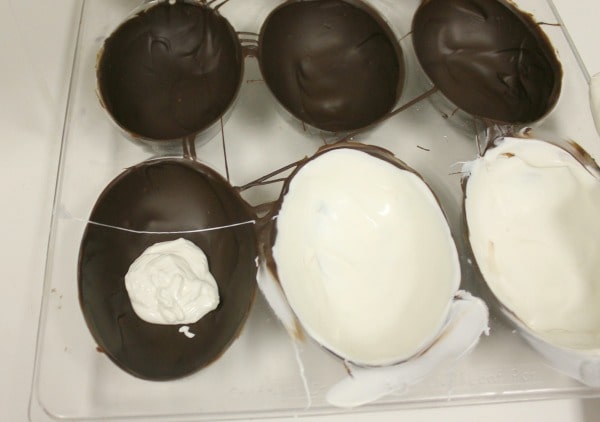
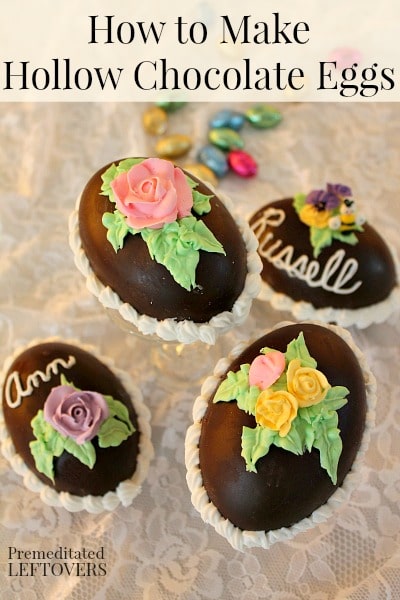
For the eggs pictured, the outside layer was chocolate, and the inside layer was white candy melts. You can use all one flavor if you prefer.
The best molds for chocolate eggs are made of a thin, hard plastic that flexes a little. These can be found in most craft stores. Decorate with pre-made edible flowers or make your own with royal icing. Use your imagination and have fun!
How to Make Hollow Chocolate Easter Eggs
Makes five 4-inch hollow chocolate eggs
Items Needed:
- 12 ounces chocolate candy melts
- 12 ounces white candy melts
- 2 teaspoons shortening, divided (optional, to thin the melted candy)
- 2 cups powdered sugar
- 2 teaspoons meringue powder (or powdered egg whites)
- 3 tablespoons water
- Sugar flowers or Easter candy for decorating
Note: Make sure the bowl and utensils you use are completely dry. One drop of water can cause chocolate to “seize” and turn hard.
Directions:
1. In a small microwave-safe bowl, carefully melt the chocolate candy melts in the microwave for 30 seconds, and then in increments of 15 seconds, stirring between each cycle. Stop when most of the candy is melted and let the bowl sit for a couple of minutes; the heat of the bowl will continue to melt the candy. Add 1 teaspoon shortening and stir well. If the chocolate isn’t completely melted, return to the microwave for an additional 15 seconds.
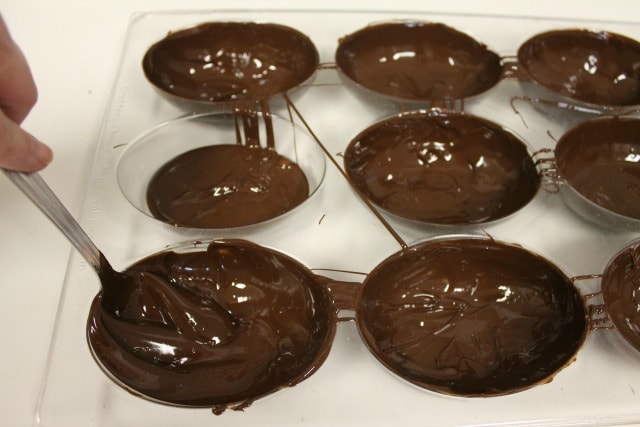
2. Working with one mold at a time, put approximately 2 tablespoons of melted candy in the bottom of the mold and tilt the mold to roll the candy around the sides. Coax it along with the back of a spoon if necessary. Make sure the entire mold is covered with a thin layer, all the way up to the top of the mold, and try to keep it from pooling at the bottom. If it does, remove a little with the spoon.
3. Repeat until you’ve coated 10 molds, and place the mold in the refrigerator for 10 minutes, or until the candy is firm.
4. Using the instructions in #1, melt the white candy melts, adding 1 teaspoon of shortening. Let it cool until just barely warm but still fluid, and add a layer on top of the first layer. You may not need quite as much candy for this layer. Work quickly so the first layer doesn’t have a chance to melt. Again, make sure you bring the white layer all the way to the top of the mold, using the back of a spoon if necessary.
5. When all 10 eggs are coated, return the mold to the refrigerator until very firm – about 30 minutes.
6. Turn the mold over on a baking sheet or towel and flex gently. If the eggs don’t fall out easily, chill a little longer.
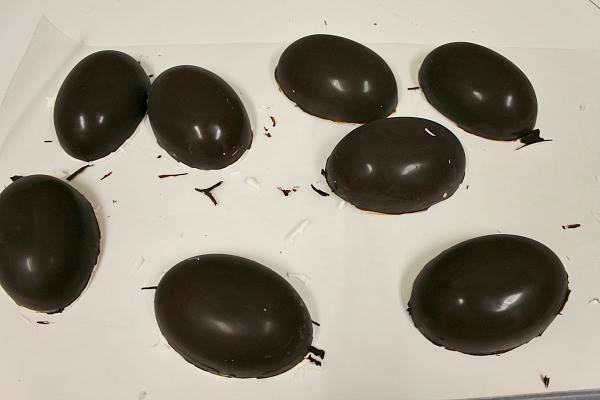
7. After unmolding eggs, gently trim any extra candy from the top edge with a sharp knife or vegetable peeler, handling the eggs as little as possible. You may want to wear thin plastic gloves or use a paper towel to avoid leaving fingerprints.

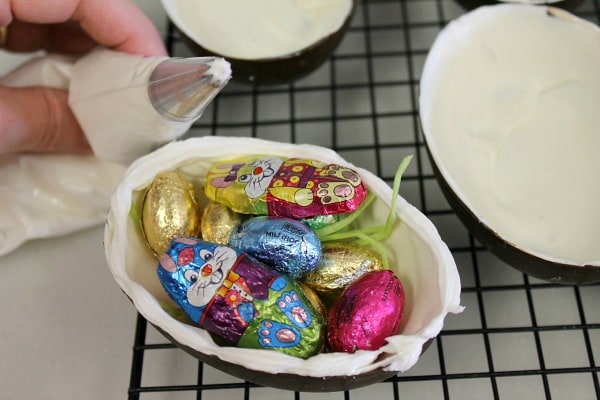
8. Fill 5 of the eggs with candy or treats.
9. Make royal icing by combining the powdered sugar and meringue powder, and then adding the water a little at a time, beating continuously. Beat on medium high for 3 minutes, adding a little more water if necessary to get an icing with good piping consistency.
10. Pipe a thin line of royal icing around the top edge of the filled eggs and carefully place the top egg shell over it, pressing gently. Remove any excess icing from the outside with a knife.
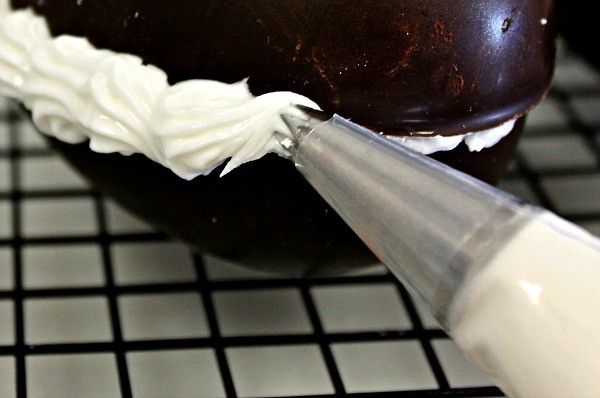
11. Using a pastry bag fitted with a #21 open star tip (or other decorative tip) pipe around the egg, covering the line where the top and bottom meet. Allow the icing to dry thoroughly before moving or decorating the egg.
12. Tint some of the icing green for leaves and pipe with a small leaf tip. Add decorations of your choice. You can find tips for making flowers with royal icing here.

You can pipe names onto the hollow chocolate eggs and use them in place of name cards on your Easter dinner table. They will do triple duty as edible name cards, Easter table decor, and treat for your guests to take home with them.
When your family and friends break open their chocolate eggs they will be surprised to discover the treats you have hidden inside!
Printable Directions for Hollow Chocolate Easter Eggs

How to Make Hollow Chocolate Easter Eggs
Ingredients
- 12 ounces chocolate candy melts
- 12 ounces white candy melts
- 2 teaspoons shortening divided (optional, to thin the melted candy)
- 2 cups powdered sugar
- 2 teaspoons meringue powder or powdered egg whites
- 3 tablespoons water
- Sugar flowers or Easter candy for decorating
Instructions
- In a small microwave-safe bowl, carefully melt the chocolate candy melts in the microwave for 30 seconds, and then in increments of 15 seconds, stirring between each cycle. Stop when most of the candy is melted and let the bowl sit for a couple of minutes; the heat of the bowl will continue to melt the candy. Add 1 teaspoon shortening and stir well. If the chocolate isn’t completely melted, return to the microwave for an additional 15 seconds.
- Working with one mold at a time, put approximately 2 tablespoons of melted candy in the bottom of the mold and tilt the mold to roll the candy around the sides. Coax it along with the back of a spoon if necessary. Make sure the entire mold is covered with a thin layer, all the way up to the top of the mold, and try to keep it from pooling at the bottom. If it does, remove a little with the spoon.
- Repeat until you’ve coated 10 molds, and place the mold in the refrigerator for 10 minutes, or until the candy is firm.
- Using the instructions in #1, melt the white candy melts, adding 1 teaspoon of shortening. Let it cool until just barely warm but still fluid, and add a layer on top of the first layer. You may not need quite as much candy for this layer. Work quickly so the first layer doesn’t have a chance to melt. Again, make sure you bring the white layer all the way to the top of the mold, using the back of a spoon if necessary.
- When all 10 eggs are coated, return the mold to the refrigerator until very firm – about 30 minutes.
- Turn the mold over on a baking sheet or towel and flex gently. If the eggs don’t fall out easily, chill a little longer.
- After unmolding eggs, gently trim any extra candy from the top edge with a sharp knife or vegetable peeler, handling the eggs as little as possible. You may want to wear thin plastic gloves or use a paper towel to avoid leaving fingerprints.
- Fill 5 of the eggs with candy or treats.
- Make royal icing by combining the powdered sugar and meringue powder, and then adding the water a little at a time, beating continuously. Beat on medium high for 3 minutes, adding a little more water if necessary to get an icing with good piping consistency.
- Pipe a thin line of royal icing around the top edge of the filled eggs and carefully place the top egg shell over it, pressing gently. Remove any excess icing from the outside with a knife.
- Using a pastry bag fitted with a #21 open star tip (or other decorative tip) pipe around the egg, covering the line where the top and bottom meet. Allow the icing to dry thoroughly before moving or decorating the egg.
- Tint some of the icing green for leaves and pipe with a small leaf tip. Add decorations of your choice. You can find tips for making flowers with royal icing here.
Notes
More DIY Easter Ideas
- DIY Yarn Easter Eggs
- How to Make Sugar Eggs with a Panoramic Scene
- 15 DIY Easter Decorating Ideas
- 15 Easter Crafts for Kids
- How To Dye Eggs Naturally
- 15 Ways to Decorate Eggs
- Easter Games for Kids
- Hot Cross Buns Recipe
Tucked away in the Huckleberry Mountains of Washington State, Lorinda spends her time baking for her blog, The Rowdy Baker, and writes a monthly food column “Food for Thought” for Yummy Northwest. She was a competitor in Blogger Idol 2013 (no small feat for a food blogger) but prefers to gather her fame in the form of blue ribbons at the county fair. She bakes with abandon and watches the flour fly!

Jamie says
I never realized that I could make my own – I’m going to have to look for the mold! Thank you for sharing with us at the #HomeMattersParty
Emily@Oat&Sesame says
Even as a grown-up I’d love to find a chocolate egg with hidden treasures in my Easter basket! Such a great project!
sherry says
Your work is beautiful! This would be so much better than store bought.
Rosemary @ An Italian in my kitchen says
I absolutely love this idea, thanks for sharing at the Project Parade Link Party.
Melissa French, The More With Less Mom says
I need to get some molds, my kids would love these. Thanks for posting. Hello from Busy Mondays.
Ginger says
Looks amazing! Will definitely have to try this! I bet you could even use chocolate to seal so they can’t tell where the seam is. Thanks for linking to Show Me Saturday.
Brandi Clevinger says
I didn’t know so much went into making these. What talent, creativity, and patience you have! They are beautiful.
Thanks for sharing at Inspire Me Mondays!
Valerie says
So cute!
Jennifer says
These are beautiful! You do amazing work.
Linda Nelson says
They look as fun to make and decorate, as to eat.
Natasha Rodriguez Mom 2 5321 says
Oh my goodness I love this idea! Do you mind if I share and link to it with my readers?