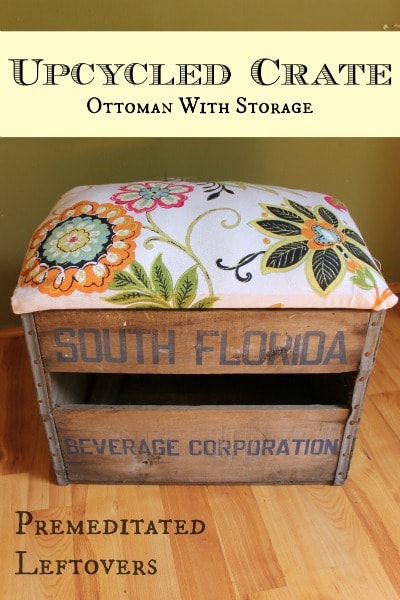
Hubby picked up this old treasure at a yard sale for $5.00, and as soon as I laid eyes on this crate I knew it needed to become an ottoman. Perfect for toy storage in the living room with a bright, and pretty fabric to dress it up. If you don’t have an old similar crate on hand like this one, you can pick up unfinished wooden crates at just about any hobby and craft store, or even Walmart for about $10- stain it, paint it, or leave it as is and follow the tutorial to create a padded lid for it. Stencil letters on your crate, add handles, and a fabric that coordinates with your décor to make a beautiful accent piece for any room in your home. I think treasures that we at least add some of our own handmade touches to are so much more valuable than store bought.

How to Make an Ottoman from a Crate
Supplies Needed:
- Crate
- board
- 2×2’s
- cotton filler
- fabric
- scissors
- staple gun
- drill and screws
Directions:
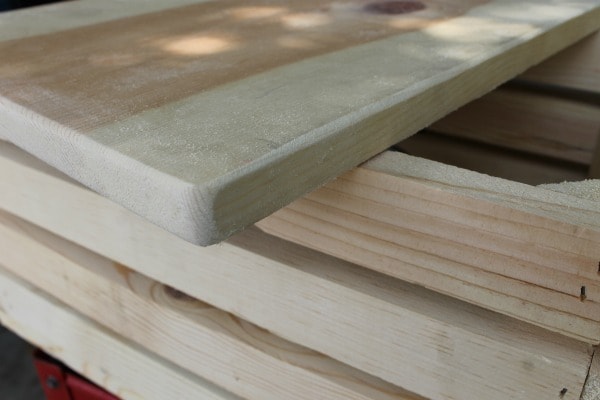
Measure the top of your crate, from outside edge to outside edge. Cut your board to fit ( Home improvement stores will often cut for you for free or less than $1 per cut- worth it to save a step). Use a router or palm sander to round off the corners and edges of your board, this will keep your board from poking through your fabric, and also make it a little safer without sharp edges.
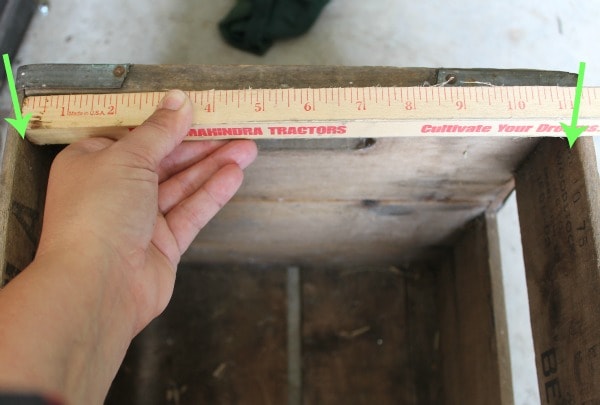
Measure your crate on the inside of the short ends, mark one side of your boards with the inside measurements of crate. Cut 2×2’s to the measurement of the short ends of your crate.
Measure fabric to fit your board plus about 6″ extra length and width. I like to use duck cloth from Hobby Lobby- it’s sturdy, comes in a wide variety of patterns, and with a 40% off coupon it is very affordable! Starting on your board length ways staple your fabric taut, staple fabric on the opposite side, leaving fabric loose for stuffing- 1 1/2-2 ” is plenty for your stapled “seam”. Staple one short end and leave the other open, fill with stuffing- I spent a good 10 minutes adjusting and making sure stuffing was even and filled in each corner well. Finally staple your remaining end. When doing the corners two short ends if folded them in at the corners like you would if you were gift wrapping a box.

Screw 2×2’s onto the board over your fabric. ( or have your hubby use his super fancy air gun nail thingy to secure them).

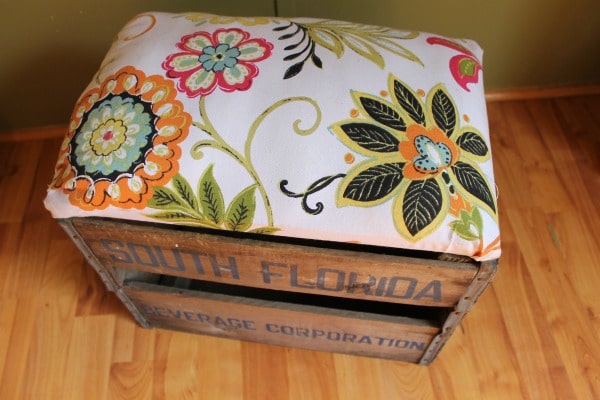
Fit board into opening of crate.
If desired, spray your fabric heavily with a scotch guard to make it easier to clean, so minor blemishes can be wiped away without taking it apart completely.
Use your new storage ottoman for books, toys, DVDs, dog toys, or whatever needs to be corralled neatly. I plan on using mine to hold a couple of extra throw blankets.
More DIY Home Decor Projects
- 5 Tips for Perfectly Painted Furniture
- DIY Wall Decor – Upcycled Hanging Vases
- DIY Desk – Upcyled Bar Stools
- DIY Vintage Dresser makeover
- How to Make a Fabric Strip Valence
- DIY Fabric Scrap Lampshade

Teri Herzog says
I love this crate ottoman,. I live in Jax.Fla. what part of Fla are you from. thanks Teri
Jody says
Thank you Teri! I am in a miss-it-if-you-blink little town in Pasco Co.