Candied rim glasses are a frugal and easy way to take your Valentine’s decor to the next level. Here’s how to make a candied rim glass.

Candied rim glasses are a fun and budget-friendly addition to Valentine’s parties for kids or adults. Despite how fancy they look, they only take a few minutes to make. Here’s how to make a candied rim glass with just a few ingredients.
How to Make A Candied Rim Glass
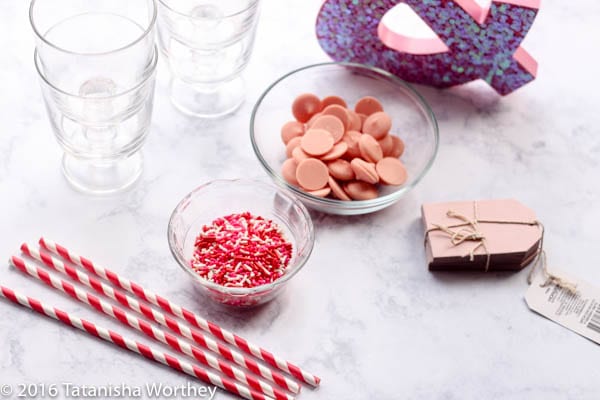
Supplies Needed:
- Valentine’s Day related sprinkles (or you can make a mix of red jimmies, white jimmies, and pink jimmies)
- Wilton’s Pink Candy Melts
- Glasses
- Pink & White Paper Straws (optional)
- Pink Gift Tags (optional)
Directions:
- Melt your candy (follow directions on package).
- Once the candy is melted, stir it around for about 30 seconds.
- Then firmly place the glass inside of the bowl. Ensure the rim is entirely covered with the melted candy.
- Moving quickly, take the glass out of the candy bowl, and place it in the bowl (or plate) of sprinkles and rotate it around so the melted candy sticks to the sprinkles.
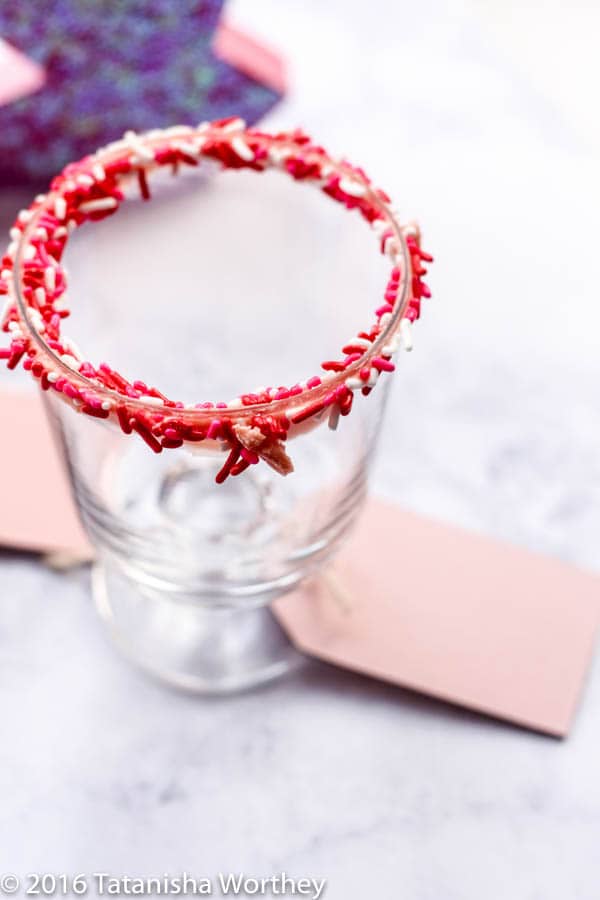
I would let them dry for about ten minutes.

Fill the glasses with milk or desired beverage. Hopefully, giving you a quick and easy Valentine’s party decor idea will help take the stress off of your party planning. If you liked this idea, be sure to check out my “Owl Be Your Valentine” kid-friendly tablescape! And if you’re planning an adult Valentine’s Day Dinner Party, this frugal party idea will be just what you need to pull off a grand party on a frugal wallet!
- Valentine's Day related sprinkles (or you can make a mix of red jimmies, white jimmies, and pink jimmies)
- Wilton's Pink Candy Melts
- Melt your candy (follow directions on package).
- Once the candy is melted, stir it around for about 30 seconds.
- Then firmly place the glass inside of the bowl. Ensure the rim is entirely covered with the melted candy.
- Moving quickly, take the glass out of the candy bowl, and place it in the bowl (or plate) of sprinkles and rotate it around so the melted candy sticks to the sprinkles.
- Let sit for 10 minutes until the melted candy hardens.
If you need ideas for Valentines Day food, be sure to check out all of the Valentine’s Day related treats below.
- Cherry-Flavored White Chocolate Hearts
- Chocolate Dipped Clementine Hearts
- Homemade Dark Chocolate Truffles Hearts
- Cherry-Flavored White Chocolate Hearts
- 20 Gluten-Free Valentine’s Day Desserts
And be sure to check out other Frugal & Easy Valentine’s Day Party Ideas for more inspiration!

Leave a Reply